Project Based Learning – Burtis

Project Based Learning – Burtis

This is designed for my Algebra 3 course, which is made up of seniors planning to further their education, but not in a math or science field. Since these seniors are in the process of finalizing plans for education after high school, felt it would be instructive to combine their search for information about options to our first unit on exploring data. The project will not necessarily drive the learning, but should reinforce it by it’s application.


THE CHALLENGE QUESTION:  “College, is it worth it? What are the important factors?”

Objective: Collect, sort, analyze, represent and model data.

Set-up: The first 2 units (the first quarter) are devoted to a unit on Exploring Data and one on Functions and Models. The students will combine what they learn through the week to a project examining the factors that go into choosing a college to attend.  The project will be worked on each Friday.

Materials: will vary by specific topic, but internet access, a shared folder for storing research, and a graphing utility will factor in.

Standards: I have not listed the individual standards, as this project will span 2 units and will include a wide variety of standards related to statistics, functions, and modelling. The Monday-Thursday lessons will focus on the standards, the project is an application of them.

Mathematical Practices: All will be touched during the 8 weeks of the project

  1. Make sense of problems and persevere in solving them.
  2. Reason abstractly and quantitatively.
  3. Construct viable arguments and critique the reasoning of others.
  4. Model with mathematics.
  5. Use appropriate tools strategically.
  6. Attend to precision.
  7. Look for and make use of structure.
  8. Look for and express regularity in repeated reasoning.

Project Goal:

  • To collect enough data to illustrate how things have changed in their lifetime.
  • To represent that data to help inform their own decisions on their future plans.
  • To generate, conduct, and analyze a survey of their peers pertaining to their decisions and what was/is important.
  • To predict what may change for in-coming freshman, who will be making that choice in 4 years.
  • To represent that information to juniors to help inform the choices they will be facing next year.

Day 1:

The question above will be presented to the students on the first day of Unit 1 via a Chalk Talk. All realms of costs, benefits, advantages, and disadvantages of going to college will be open for discussion. The goal of the Chalk Talk will be to come up with all the different aspects of the college choice experience that can be quantified. Some that I am hoping show up include:

  • Tuition cost
  • Book costs and options
  • Room and board costs
  • Earning potential by degree
  • Private versus public costs
  • 4-year versus 2-year benefits
  • In-state versus out-of-state issues
  • Reputation versus earnings potential
  • Commuter versus on-campus choices

Not a complete list, but just a few topics that came to mind during planning phase. The students will choose which aspect(s) they would like to focus on. Teams of 4 or 5 will then be made up accordingly.  Some may find that they touch on more than one topic, which is great. There may also be more than one team researching a topic, which is also fine. I will encourage them to include more than just one aspect.

I plan to ask the students to limit their searches to Ohio and the bordering states, which would be Indiana, Kentucky, Pennsylvania, and Michigan. They will be given the autonomy to specify what region they would like to focus on. Some potential options would include: southwest Ohio; all of Ohio; schools within a 3-hour radius; or schools on the east coast. I want it to be personal and meaningful to them, but do not want to overwhelm them by forcing too broad a spectrum to consider.

Managing the Project:

Monday through Thursday, the normal curriculum map will be followed, offering a variety of different delivery formats and examples. Data collection, data analysis, accuracy of data, and reliability of data will be discussed. Creating representations of the data and choosing the proper form that should take will be discussed. Potential trends and possible changes in the data will also be discussed. Periodic reviews and quizzes will take place just like normal.  All of this will be done independent of their projects.

From this point out, however, every Friday will be devoted to their specific project. Chromebooks are available in class, and all students have access to their own drive. A shared folder will be created for sharing data. Each team will be asked to submit 2 different data sets relevant to the project that all will be able to access. Sharing data sources will be the expectation.  Team interpretation and forms of representation will be unique.

The class will devise a survey on Google Forms that their peers will fill out, asking questions about their respective college decisions and the factors that went into it. The results should be included in their final presentations. Since all core courses are one to one, I will seek cooperation of colleagues who teach seniors for help in facilitating as many respondents as possible. I will share the results with colleagues should they be able to use it in their classes.

Every three weeks, I will assign a reflection piece to be done individually over the weekend, asking each student to reflect on their team’s process, their team’s results, what they personally like so far, and what they personally would like to do differently. I will read through and return so that they can discuss at the start of the next Friday work day.

As we move to Unit 2, (about week 6) they should have data to use and analyze and some opinions will be forming.  Unit 2 deals with Functions and Models, and the students will take the data they have collected and create a model of their data, complete with classifying the function and developing an equation for predicting what will happen 5 years down the road. That will be the final piece of their presentation.

Outline of Tasks that should happen on Fridays: The order and progress will vary by team.

  1. First Friday will be whole class – preparing the survey for their peers.
  2. Define their search parameters: where are they focused and why.
  3. Target and find data relevant to their project.
  4. Research reliability of data found and shared, and how it factors into their search.
  5. Decide on and begin production of at least 2 different representations of their data.
  6. Follow-up on any outside influences or factors that may affect their data and representations
  7. Begin producing final product: poster, pamphlet, PowerPoint, etc.
  8. Decide on related function(s) and derive an equation from which they can predict what will happen over the next 5 years.

Assessments:

  • Every Friday, each team will submit a short exit ticket summarizing where the team is at in their project and what their goal will be for the next Friday.
  • Teacher will circulate through the room on Fridays asking questions and viewing the collaboration that is (or isn’t) taking place.
  • Will review reflective pieces every three weeks. Should be two of them.
  • The final products will be put up in the room and each student will assess each product based on content, presentation, and relevance.
  • Each student will fill out a form assessing their own and their teammates contributions to the project.
  • The final product, in the form of posters and charts, will be displayed for juniors to view to assist their decisions.
  • Hopefully, select groups will be able to attend the College Fair our school normally hosts to display their project and answer any questions that may arise. (Will need approval for this!)

Media:

https://www.youtube.com/watch?v=cIZzl_QS7YA  (why study statistics)

https://www.youtube.com/watch?v=nzvaD8a1_kY  (histograms vs bar graphs)

https://www.youtube.com/watch?v=y5P8aMakoAs  (pie charts)

https://www.youtube.com/watch?v=E91bGT9BjYk  (misleading graphs)

https://www.youtube.com/watch?v=qKPhtBIsyIY  (Presenting data)

https://www.youtube.com/watch?v=1b5h5SNoyLg (Modeling Data Regression Functions)

https://www.youtube.com/watch?v=p_4RYCfsGvU  (better college choices)

https://www.youtube.com/watch?v=h7DxsOq-bW0  (things to consider…)

Posted in Misc, Project-Based Learning | Tagged , , | 23 Comments

PBL – Heller

Project Overview: For this project, students will be working to create optimal bus routes for the school district. The district has determined that the bus routes are not longer the most effective or efficient based on many factors. Students will be investigating the current bus routes and will create presentations for the school board with their optimal bus routes.

Students will need to consider things such as (but not limited to):

  • Location of bus stops in relation to bus riders’ residences
  • Time the route will take
  • Distance the route will cover
  • Number of busses and drivers needed
  • Miles per gallon of the busses
  • Speed limits
  • If the morning route will be the same as the afternoon (early bird classes and extracurricular involvement)
  • Time and distance busses travel from the garage

This project is designed to be completed in groups of 3 – 4 students, but can be completed individually if desired.

Student Learning Goals (Standards): 

Key Knowledge and Understanding  (Standards):

HSA.SSE.A.1.a HSA.SSE.B.3 HSA.CED.A.2 HSF.LE.A.1 8.G.B.7

Key Success Skills:

MP1 MP3 MP5 MP6 MP7

Prior Knowledge: This PBL lesson is intended for an Algebra I course. Students in Algebra i courses have been exposed to the pythagorean theorem and elements of slope prior to this unit. Throughout the unit, students will apply their knowledge of slope, rates of change and pythagorean theorem as well as many other academic skills. Depending on the demographic area and age of Algebra I students, many Algebra I students are beginning to learn to drive, which will allow them to apply their knowledge of gas milage and cost with an academic focus.

Project Outline: Challenging Problem or Question:

Students will be given the following prompt at the beginning of the unit:

District 219 is looking to reroute the busses to be more efficient and cost effective. How can the bus routes be altered to accomplish this?

*You may not eliminate the busses unless you’ve created a more efficient route with less busses and the stops have to continue to accommodate all students in the same manner as they are currently.*

Students will be assigned their groups so that each group has a mix of mathematical ability and variety of problem solving skills.

After being presented with the prompt, students will watch these two videos as a class.

After the videos, students will complete a chalk talk to begin brainstorming different ideas as to what they may need to know, what to know or already have ideas about what to change with their groups.

Each group will post their mini chalk talk around the room and students will be able to continually contribute to all group’s chalk talks as the unit progresses.

Throughout the unit:

Each lesson in this unit will have elements that tie into the overarching PBL question.

  • Graphing Linear Functions: Students will discover graphing linear functions through the lense of maps. After graphing linear functions on traditional graphing tools (paper, desmos, etc) they will be given maps to graph on to determine if a given line is a feasible bus route (based on physical streets) Students will be asked the following questions:
    • What types of restrictions do you have when designing your bus routes?
    • How can you accommodate for those restrictions?
  • Rates of Change & Slope: Students will be discovering rates of change and slope by working with data that depicts distance vs time. This will allow students to make connections between data and linear functions. Students will apply these connections to their bus routes as students are trying to optimize the time and distance relationship for their proposal. Students will be asked the following questions
    • In what ways is slope related to your bus routes? What does the slope represent for that scenario?
    • Would there be a faster way to get to your location given the speed limit?
    • How could re-routing the busses make sense based on the data you have collected?

Students will explore may other aspects of linear equations including restrictions on domain and range, parallel and perpendicular lines, systems of linear equations, etc, which will all contribute to students’ bus route proposals.

After each lesson, students will reflect upon the new knowledge they have gained and brainstorm with their group ways in which this new information may impact their design. As students work through the lesson, there will be continual reflection and revision of their bus route proposals. Students will be provided time for reflection and revision every other day so that the process is ongoing in accordance with new information they are learning.

Presentation:

At the end of the unit, each group will present their bus route proposal to the class. For each presentation, we will have a class discussion on the pros, cons, and questions and ideas for improvement. Once each group has presented their proposal to the class, groups will be given two more class days to revise their proposals based on their classmates feedback before submitting their proposals to the school board.

*Students have the creative choice to present their projects in whatever way they choose. Students can present using PowerPoints, poster board, etc. Allow students to be creative and original.

Assessment: Throughout the unit, it is incredibly important to be formatively assessing students on a regular basis. For this lesson, formative assessment will primarily be done in three different ways:

  • Exit slips: Exit slips will be completed after each lesson has been taught to ensure students are learning the appropriate material at an appropriate level. Differentiation and remediation will be provided when necessary for students who are not grasping concepts throughout the unit.
  • Observation: As students work on their projects, I will observe and ask questions that pertain to their proposals.
  • Progress Checks: At various points in the unit, I will ask students to present what they have so far to me. This allows me to monitor how much progress students are making to ensure that the projects will be completed on time. These progress checks also allow me to check student work, equations and calculations for accuracy as well as appropriateness to the project. I will also be able to ask students questions that they may have not yet considered in their models.

Summative assessment: Students will be assessed on their final presentation and their final product using a structured rubric. Students will have access to this rubric from the beginning of the unit so they are aware of the expectations.

Teacher Notes: Being aware of the streets in your community is vital to this project. Students at this level do not yet know quadratic functions (although the project could be adjusted to later in the curriculum to include quadratic functions.) Without the knowledge of quadratics, “curvy” streets may be difficult to account for within their bus route models. Students can use online graphing tools with guidance to account for these streets in their neighborhood.

Possible Extensions: 

  • Involve “math mentors” from upper level math classes (calculus) who can assist Algebra I students with the optimization and function content knowledge they have not yet been exposed to. These students can work with the Algebra I students to expose them to upper level mathematics and motivate them to continue their mathematical learning process.
  • Mathematical modeling: Students can extend their proposal for their local community into a model that can make any district’s bus routes the most efficient and effective.
  • Relate the school bus route model to public transportation. What goes into planning public transportation? How is this similar or different from school bus routes?
Posted in Project-Based Learning | Tagged , , , , , , , | 51 Comments

PBL-Walters

The Carnival Game PBL project that I designed for my 7th grade Math classroom is designed to be a project happening towards the end of the year.  We finish the school year learning about probability so this will be the project that ends that unit.  I anticipate this being a 2 week project in our curriculum.

Intro of Project:

Project will be introduced by showing the video Caine’s Arcade which is a true story of a little boy who builds an arcade completely out of cardboard (If you have never seen the video you need to watch it now.  It is an amazing and heartwarming story! 🙂 )

The following question will be posed to the students:

  • How can you design a carnival game to where not everyone will win the game, but it will still be a game that people will want to play (meaning that there is a chance to win)?
You CAN You CANNOT
  • Have a group of 1, 2, or 3 with people who have a similar plan as yours and who you will get along with
  • Try to negotiate with your Math teacher to make a group of 4 or more
  • Bring in supplies from home
  • Bring in wood, paint and balloons (based on school rules)
  • Imagine how much “money” people would win playing your game
  • Bring in candy, tickets, or other actual prizes to hand out (this is based on our school rule)
  • Use cardboard and other paper supplies
  • Use water
  • Create a game that can sit on the floor OR a table
  • Create a big game to where you can’t even get it out of the room 🙂


STEP 1:
 BRAINSTORMING

***THIS MUST BE SIGNED OFF BY ME BEFORE YOU CAN BEGIN CONSTRUCTING ANYTHING.

  • Draw a Rough Sketch of your Game (everyone must have this drawn in your group)
  • List out Materials needed:
  • List out the Rules:
  • How do people win your game?


STEP 2:  BUILD YOUR GAME

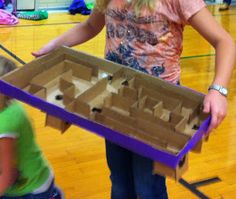
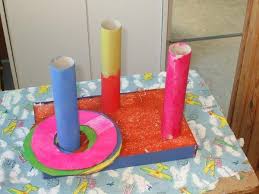
Here are some of the games I anticipate students making:

STEP 3:  MAKE YOUR GAME READY FOR THE CARNIVAL

  1.  You need to have simple rules posted so that anyone can walk up to your game, read the rules, and learn to play quickly and easily.
  2.  You must post how much “money” it is to play.
  3.  You must post how to win.
  4.   You must have posted how much “money” you would win.

STEP 4:  THEORETICAL PROBABILITY

Find the Theoretical probability of winning your game.  Remember, this is the chances of winning your game in a “perfect” situation.  Work will need to be shown.  

STEP 5:  EXPERIMENTAL PROBABILITY

Each person needs to play the game 50 times and record how many times you win.

STEP 6:  CREATE YOUR PRESENTATION—Individualized Presentations, not 1 per group

Google Presentation must include: Name of Game, Rules to your game, How do you win, How much to play, How much you will win, Theoretical Probability with brief explanation of how it was calculated and Experimental Probability

STEP 7:  WRITE YOUR REFLECTION

Students will be required to submit either electronically or written by a hand a reflection of their game.  Included in the reflection must be the answers to following questions.

  • What role did you play within your group?
  • Why should your game be a part of a carnival?
  • What were some of the difficulties/challenges in designing a game that people could win but not be super easy to win every time?
  • What was the data you collected the day of the carnival and what surprised you from the data?


CARNIVAL DAY!!

  • Students will go down to set up their carnival in our school’s common area.  They will need to come up with a system to track how many people play and how many people win their game.
  • They will take turns playing their classmates games and will vote at the end for the one that they enjoyed the most
  • Parents and other school officials are invited to come and participate as well.  They will also be included in voting for the favorite game.

GRADING RUBRIC:  Here is a link to the grading rubric I plan to use.

Posted in Project-Based Learning | Tagged , | 156 Comments

Project Based Learning- Lauren Hickman

Project Based Learning

Image result for project based learning

Student Guide: What do I do next?

This project based learning final product will be a culmination of information learned by high school students throughout the unit. Throughout the unit, students will cover topics and mini topics having to do with options that are possible after graduation. At the end of each topic groups will converge and work on portions of The Guide which will be created out of their own interpretations and questions about what to do after high school.


Student Learning Goals:

Key Knowledge and Understanding- Students will understand that there are many avenues toward higher education. They will learn to think critically about which paths are best for different students and how to navigate the process. 

Key Success Skills- Students will be able to interpret different viewpoints and think about bias. Students will learn to become smart consumers of information and understand that their next step is their own choice. Students will work collaboratively with each other and listen to ideas that are different from their own. They will learn to time manage and carry the project to completion.

The Harsh Truth: U.S. Colleges are Businesses and Student Loans Pay the Bills https://www.theguardian.com/money/us-money-blog/2014/oct/07/colleges-ceos-cooper-union-ivory-tower-tuition-student-loan-debt

Challenging Problem or Question-

What should students do after graduation?


Sustained Inquiry-

Students will ask themselves what are my options after graduation? Each student will explore different avenues and weigh the pros and cons of each option. Students will also focus on where those avenues will lead them, what will they do after they choose that path.

https://hiring.workopolis.com/article/10-things-that-make-a-job-awesome/

Students will have many options for inquiring about the topic,

  • Researching online what the different options are
  • Interviewing others who have navigated different post graduation routes
  • How many students go that specific route?
  • Looking up the cost of different options
  • Looking up the career and salary outcomes of different options
  • Talking to staff members or those who recruit students to the different options
  • Talking to peers to find out what questions or concerns they have about what to do after graduation

Authenticity-

In addition to including students voice and choice, the product and the exploration of the topic will also be based on the current social climate. This means each year the project will be authentic for each group of students who participate in the PBL. 


Student Voice and Choice-

This project will be completely based around the students questions and concerns about what they will do after graduation. The final product, “Student Guide: What do I do next?” will be a booklet guide from students to their peers rather than from an adult for students.


Reflection

Each week students will spend time thinking about the big picture. Students will be encouraged to sit back and think about what had been explored that week, if things need to be elaborated on or if the next topic can be explored. Ultimately the guide is meant to help students feel at ease and prepared with useful information before making their post graduation plans. Does the guide actually answer some of their own questions or are we creating this guide just to get it done?


Critique and Revision-

Students will be able to critique what they have created as a team, if it makes sense, if it answers questions, if it solidifies previously held ideas etc. Students will also want to critique the actual layout of the Student Guide. The booklet should be easy to read and should make sense to other students.


Public Product-

The Student Guide: What do I do next? Will be the final culmination of students work and research. This will be a tangible product that students, teachers, community members, parents and others will be able to read and explore. By creating this booklet, students will feel like their research can actually be impactful and shouldn’t just stay within the walls of the classroom. Most students feel nervous and unprepared about what to do after graduation, so why not create something to help everyone.


Posted in Misc | 182 Comments

PBL – Frydryk

Title:  Cats Don’t Like Swimming… Unless it’s a Wildcat!

Description:  There’s no public pool in Harrison – until now!  With your group, you will explore all of the details of planning for, building, and managing a public pool for Harrison.  There are quite a few things to consider:  location, builders, the pool itself, employees, etc.  Create a presentation that includes all pertinent details that City Council would need in order to decide whether to move forward with opening a public pool in Harrison.

Standards:
Suggested/encouraged content:
Optimization to figure out price to charge/ideal number of customers/size of area where pool will be
Integrals to calculate volume of pool (once size is determined)
Related rates – filling the pool

Prior Knowledge Needed/When to Teach:
Calculus.  Students should be familiar with optimizing functions, solving related rates equations, and using integrals to calculate integrals.

Timing: 4 weeks total, but project may span many months as more content is learned

Materials/Resources:
Computers
Pool builders
City council/zoning/building policies

Outline:
3-4 days (blocks) at a time will be provided for this project.  As more content is learned (and students see the room for application), another Block will be provided.  With each of these Blocks, the content that is suggested to be used has not been taught yet, but is next is succession.  This is done in an effort for students to use their direct prior knowledge to recognize the need for the next topic in their project.  Suggested Blocks are given below.
Block 1: (3 days)
Groups are decided.  It is recommended that multiple group activities are done before this in order to assist the teacher in grouping students in a mutually beneficial way.
Problem is introduced.  Use a Think, Puzzle, Explore with students to individually, then in groups, then as a class discuss the problem.
Share the Final Project Rubric with the students and discuss.
Begin preliminary planning.
Reflection (see prompts below).
Block 2: (after derivatives are taught. Suggested content:  optimization. 4 days.)
Students are prompted to consider the location and physical size of the pool (maximize area, minimize resources).
Reflection.
Block 3: (after derivatives are taught. Suggested content:  related rates. 4 days.)
Students are prompted to consider filling the pool with water, max capacity (persons) of the pool, max capacity of the pool area, etc.
Possible resource:  http://mrmeyer.com/threeacts/watertank/
SHARE.  Spend 1 days sharing what students have accomplished thus far.  Each student will provide each group with one thing they like about each project and one suggestion of how to improve/move forward.
Reflection.
Block 4: (after integrals are taught.  Suggested content:  calculating volume. 4 days.)
Students are prompted to consider the shape and volume of the pool.
Reflection.
Block 5:  (whenever – 5 days)
Students are prompted to consider hiring, opening procedures, other aspects.
Final touches on the project!  Be sure all components are addressed in your presentation.
Presentations!  A city council person and/or pool manager and/or engineer can be brought in to provide feedback on ideas.
One final option, if possible, is to present ideas to city council.

Assessment:
Reflection journal entries will be done at the end of each Block (excluding the last one) as a homework assignment.  Students will address the following prompts:
  1. In what ways did your small group support you in your learning in this Block?
  2. What roles did you serve in your small group in this Block?
  3. How did you use Calculus in this Block?
  4. What math concepts do you wish you had more information on in this Block?


Final Project Rubric – Standards
(provide to students at the beginning of the project)

  1. Connection to Calculus
  2. Consideration of Variables
  3. Group Participation Ranking (students rank each other on their participation)
  4. Presentation
  5. Final Reflection

Final Reflection (done individually after the Presentations are done)
Same questions from reflection journal entries.

  1. What is one thing you would have done differently with your project?
  2. What strengths did you bring to your group?
  3. Summarize how Calculus was used in your project.
Posted in Project-Based Learning | Tagged , , , , , | 8 Comments

Bradford: Project-Based Learning Lesson Plan

Project-Based Learning: Design Your Own Desk!

Project Overview For this project, students will be designing new desks that they would like to see in the classroom.   These desks could have tops in the shape of “half donuts” or the traditional desk tops.  Students will make a small 3D model of their desk to share with the class.

  • Students will need to figure out how much solid material (whether it be plastic, metal, wood, etc.) is needed to make their desks, as well as how much flat material (veneer for the top of the desk, paint, etc.) is needed to cover the desk.
  • This project could be done individually, or with a group of students.  The rest of the lesson plan is structured for individual students, but could be easily adapted for groups.
Unit Overview This project corresponds with a unit covering volume and surface area of 3-dimensional figures.

In this unit, students will be reviewing/learning the following concepts:

  • Volume of Prisms, Pyramids, Cylinders, and Spheres
    • Students learn that the volume for any prism can be found by multiplying the area of the base by the height.  They also learn that the volume of any pyramid can be found by multiplying the area of the base by the height and dividing by 3.
  • Surface Area of Prisms, Pyramids, Cylinders, and Spheres
  • I will be covering volume with students before covering surface area.
Prior Knowledge
  • This lesson is intended for students taking 7th grade advanced math, because students in regular 7th grade math are not exposed to 3-dimensional figures with circular bases (i.e. cones or cylinders).
  • Prior to this unit, students have learned how to find perimeter, circumference and area of 2-dimensional figures.  They are also familiar with the surface area and volume of rectangular prisms.  Students have also learned how to scale down images, which will become helpful when creating the 3-dimensional model of their desk.
Standards
  • CCSS.MATH.CONTENT.7.G.A.1 Solve problems involving scale drawings of geometric figures, including computing actual lengths and areas from a scale drawing and reproducing a scale drawing at a different scale.
  • CCSS.MATH.CONTENT.7.G.B.4
    Know the formulas for the area and circumference of a circle and use them to solve problems; give an informal derivation of the relationship between the circumference and area of a circle.
  • CCSS.MATH.CONTENT.7.G.B.6
    Solve real-world and mathematical problems involving area, volume and surface area of two- and three-dimensional objects composed of triangles, quadrilaterals, polygons, cubes, and right prisms.
  • CCSS.MATH.CONTENT.8.G.C.9
    Know the formulas for the volumes of cones, cylinders, and spheres and use them to solve real-world and mathematical problems.
  • CCSS.MATH.PRACTICE.MP3 Construct viable arguments and critique the reasoning of others.
  • CCSS.MATH.PRACTICE.MP5 Use appropriate tools strategically.
  • CCSS.MATH.PRACTICE.MP6 Attend to precision.
  • CCSS.MATH.PRACTICE.MP7 Look for and make use of structure.
Project Materials
  • Pencil, paper, and graph paper
  • Scissors and glue
  • Other materials will vary depending on student needs.
Project Outline 1. Introduction (Before students have begun studying surface area and volume)

  • Posing Question: What would be your ideal desk at school, if you could design it?
    • This posing question will be asked a chalk talk; I would write the question on the board, and have each student write something on the board that they think of.  Each student will be asked to go to the board once, but they are welcome to go more than once.
    • Following the Chalk Talk, students will discuss what they wrote.  I will let students know that throughout this unit we will be designing and constructing models of our ideal desk.  I will remind them that everyone’s desk will look different, because everyone has specific things they may want in a desk.
  • Brainstorming/Drawing Initial Prototypes:  I will have students brainstorm ideas and will ask students to begin drawing what their desks may look like.  I will have students draw a regular perspective of the desk, and then a 2-dimensional image of the top of the desk.
    • Note: If students struggle to think of ideas for their desk, there are resources at the end of the lesson plan that they can use to help them brainstorm.
  • As students draw their prototypes, I will circulate the room asking questions to encourage students to think more about the details of their drawings.  Some examples of these questions are below:
    • What would be the desktop for you to have space for what you need to work on in class?
    • What do you wish a desk had that yours currently does not have?
    • What would be comfortable for you?
    • What function does this part of the desk serve?
    • Would you be able to fit your desk in a room with 30 other desks? Why or why not?
    • I see that you drew four legs on the bottom of your desk.  Are those legs rounded, or do they have flat sides?  What type of shape would you actually be making?
    • Do you want to make the edges of your desk square or rounded?
  • Class Discussion: Once students complete their prototypes, I will discuss with the class what went into making their prototypes.  What functionalities did they think about as they made their desks?  I will let students know that throughout this unit, their ideas may change and will become more refined.

2. While students are studying volume:

  • Before beginning lessons on volume: I will explain to students that their first part of the project will be finding the amount of solid materials (for example wood, metal, and plastic) needed to make the desk.  I will ask students what they will need to know before being able to do this.  Students may respond, “What types of materials we are using,” “What the dimensions are of our desks” or “How to find the volumes of our desks.” I will ask students if it makes more sense to find the volume of the desk as a whole, or break it into parts.
  • While learning about volume: I will give students time to work in class every day or every other day to work on their desks.  Their objectives in this first part of the unit are as follows, and guiding questions that could be asked are in parentheses. Depending on if students have learned what they need to know to calculate volume, they may be finding the volumes on different days.
    • Figure out what types of materials you plan to use to make the desk. (What types of materials make sense to use?  Think about cost, weight, durability, etc.)
    • Figure out the dimensions your desk is going to be. (What do you need to be able to put on your desktop?  What size should the desk be to fit the average seventh grader?)
    • Make any changes to your desk as you see fit.  Refine the drawing of your prototype to be more exact and to include dimensions.
    • Calculate the volume of the different materials needed to make the desks. (What types of figures make up your desk? Is the desktop a perfect rectangle? What shape are the legs of the desk?)

3. While students are studying surface area:

  • Before beginning lessons on surface area: I will explain to students what we have finished on the projects so far, but then will ask them what we still need to figure out.  We will discuss how surfaces often times are covered with a veneer or with paint.  I will ask students what we use to find how much of something covers the surface, and this will lead into a discussion on surface area.
  • While learning about surface area: I will give students time in class every day or every other day to work on their desks.  Their goals in this portion of the unit are as follows, and guiding questions that could be asked are in parentheses.
    • Students will find the surface area of all their desk surfaces. (What parts of the desk are you covering with that material?)
    • Students will construct a 3-dimensional scale model of their desks.  (What is the scale of your model? What dimensions do you need to think about when creating your model?  Does that look like what you drew on your scale drawing?)
    • Students will finalize their projects, making adjustments as needed, and will plan their presentations. (Questions at this point would be on a student-to-student basis.

4. Presentations, Reflection, and Revision

  • Students will present their projects to the class, and explain why they made them how they did.  Other students can ask questions to the student presenting about the details of their desks.  The teacher should encourage students to think about each others’ designs and what may be difficult about them when asking each other questions.
  • Following presentations, students will reflect on the experience of making their desks: what they would’ve done differently, improvements they would make, and what they learned.
  • Students will be asked to refine their projects and correct mistakes based on teacher and peer feedback.

Note: The teacher should use formative assessments to gauge student progress on the project, and should use these assessments to determine the amount of time allotted for students to work in class.  In order to decrease the potential for lack of engagement or effort, the teacher should only give students the time needed to work on the project in class.  Students who do not finish their daily tasks in class will be required to finish outside of class for homework.

Formative Assessment Formative assessment is extremely valuable in PBL to ensure that the level of rigor remains high, and to assess student understanding and deficits.  The following formative assessments will be taken during this unit:

  • Exit slips: Exit slips will be completed every day that I give students time to work in class.
  • Daily Observations: I will ask students questions and make observations as they work in class.
  • Progress checks: Progress checks will occur after studying surface area, and then again after studying volume.  I will check students’ calculations and will make sure their drawings and scale models look accurate.
Summative Assessment
  • Students will be assessed on the final product of their desks, their volume and surface area calculations, and the presentation of their models to the class.
Project Extensions (1)    Students could decide which desks would be best for the school to invest in.  Some factors to consider would be the cost of materials, the space that the desk takes up, and the functionality of the desk for the average student.  Students could brainstorm these factors through a chalk talk and class discussion.  Students or groups of students will create a proposal for which desk they think the school should buy, and submit it to the principal.

(2)    Individual students could use their presentations to persuade their fellow students to buy their desks.  They could include the factors mentioned in extension (1) above.

Online Resources If students are struggling to think of ideas for their desks, here are a few websites that may help them:

Here are some resources for students to use if they need re-teaching on volume and surface area, or if they would like to get a head-start on parts of their projects.


Posted in Project-Based Learning | Tagged , , , , , | 691 Comments

Cooperative Learning Lessons – Markham

Team Building Lesson – Zoom

Overview and Objectives: In a collaborative classroom, team building is an essential component of success. Students need to work together and support one another to truly function as a team while problem solving and learning together throughout the semester. Getting to know one another, building trust, and learning to communicate promote team mentalities and can be accomplished through well-planned team building activities.

Students will ultimately be placed in core teams of four for the semester, but some activities, like the Jigsaw one below, will require them to work with students outside their core group. As such, students need to have a functioning rapport with all their classmates. Zoom is a good initial team building activity for early in the course, allowing students an opportunity to create a story as a whole class.

Image result for random images

Materials:

  • Approx. 30 unique pictures of random objects, one for each student in the class.  Number the pictures 1-30 (or whatever number is in your class). *
  • Space for students to sit or stand in a large circle
  • Tape or video recorder to record the story
  • Random number generator (like the one at Random.org)

*Googling “Random Images” or “Random Objects” is an easy way to get an assortment of pictures. (See examples above and below.) These pictures could loosely follow a theme, if desired.  For example, as a math teacher, I might try to choose images somehow math-related, no matter how tangentially.  Alternatively, I could encourage or require students to utilize a math term somewhere in their segment of the story. It would not have to be in a math context, just a math term. For example, the student might say “Suddenly, there was a noise. I turned toward the sounds’ origin.”

Image result for random images  Image result for random images

Image result for random objects

Timing: 30-45 minutes, depending on the number of students and the size of their “paragraph” contribution to the story.


Process:

  • Have students form a large circle in which everyone can see each other.  Students may be sitting or standing depending on the space.
  • Turn the stack of pictures upside down, fan them out like a deck of cards, and then go around the circle having each student select one card.  Students should not look at the cards yet.
  • Explain Zoom:  “Each of you has just drawn a random picture.  Please turn it over and take a quick look at yours.  In a moment, we are going to create, collectively as a class, a story that incorporates each of these pictures.  One of you will begin a story that incorporates whatever happens to be on your assigned photo. The student to your left then continues the story, incorporating their photo, and so on.  Each of you will supply a “paragraph” to the story, which should be approximately 2-5 sentences.  Our goal is to have a cohesive story by the time the we have come full circle.”
  • Have a pre-activity discussion about team work.  Ask students to think on their own or with one or two people beside them about each of the following questions, sharing, recording answers, and prompting deeper thought as needed.  (Possible answer/target answers are in parenthesis.
  1. Why are we doing this? (Components of team work: interdependence, communication, risk-taking, trust)
  2. What makes you excited about this challenge? What makes you nervous?  (Answers will vary)
  3. What might be important to the success of this activity? (listening, connecting and building off what previous students have said, don’t overthink your possible story line: try to keep the story flowing)
  4. What other questions are there before we get started? Do we need any additional information or guidelines before we begin story-telling? (Answers will vary)
  • Use a random number generator to randomly select the photo number that will start the story, and let the story begin!  (The teacher may wish to record the story for prosperity’s sake.)


Teacher Notes:  As part of the pre-activity discussion, the teacher may wish to guide the students toward “what to do if someone is stuck?”  As this is a team effort, and it is a goal of team work to support each other, you may wish to have students brainstorm how they will jump in to help a struggling classmate.  Allowing the students to come up with this policy will give them ownership and create something they will be comfortable implementing, if needed.  (Hopefully, it will not be needed, too; the knowledge that help is available should encourage students to be brave and take risks in their contribution.)


Assessment (aka – How did we do?):  Immediately following the activity, ask students to discuss how we did as a team.  What worked well?  How might we improve in a future collaborative effort?  As much as possible, connect responses back to the components of team work identified in the pre-activity discussion.

Teachers may consider playing the story for students again at a later time.  Reminding students of where the class started, and revisiting the post-activity discussion.  Of the areas we identified for improvement, how are we doing now?


Social Media: There are interesting alternatives to this version of Zoom floating around on the internet.  For example, this one where instead of random images, pages from a picture book are cut out and given to each student.  Without showing each other your image, students must line up in the order that gets the book pages back together.


Cooperative Lesson – Transformations with Jigsaw

Overview:

Students will work in groups using provided resources and each other to become experts on one of the four types of transformations.  They will then return to their learner group and teach each other, giving all students in the group an understanding of all types of transformations.

Objectives:

Experiment with transformations in the plane:

  • CCSS.Math.Content.HSG.CO.A.4 – Develop definitions of rotations, reflections, and translations in terms of angles, circles, perpendicular lines, parallel lines, and line segments.
  • CCSS.Math.Content.HSG.CO.A.5 – Given a geometric figure and a rotation, reflection, or translation, draw the transformed figure using, e.g., graph paper, tracing paper, or geometry software. Specify a sequence of transformations that will carry a given figure onto another.

Materials:

  • Guided activites for expert group homework assignment
  • Assorted supplies for students to teach with


Timing: 3-4 class days


Process:

  • At the end of class the day before you wish to start the lesson, have students gather in their regular, core groups.  For this activity, this will be their learner group.  Students will decide who is going to become an expert on each of the four types of transformations: reflection, rotation, translation, and dilation. (2-3 min)
  • Each type of transformation will have a small amount of background information and research activities associated with it (i.e. looking up definitions in textbook, watching a short video example, etc.). WatchKnowLearn.org is a nice resource for videos that are classified by subject and subtopics, and which have been reviewed and rated by teachers and students. Students will work individually on this piece, making note of any questions they have, so they can discuss those with their fellow experts. This section will be completed as homework. (15-20 min)
  • In the next class, students meet with their fellow future-experts based off the topic of transformation they are trying to become an expert in. Students should begin with a brief discussion about the definitions and key features of their transformation. Then taking turns, students should either pose a question they had or comment on a feature of the transformation they found interesting and why. By the end of class, every student within the expert group should have a strong enough grasp to teach the necessary information to their learner groups the next day. (30-40 min)

Assessment: Do an exit ticket as students leave asking – anonymously – if each student feels confident they could teach their transformation after the time spent in their expert group that day. The teacher can use this to 1) gage whether students are ready to return to learner groups the next day, and 2) as a discussion tool for the class to self-assess the team work. If many students said they are not ready/comfortable, the teacher can open a dialogthe next day about what went wrong?  How can we improve?  Is more time needed?

  • Have students return to their expert groups, or small sub-groups of their expert groups, creating teams of no more than 4 students.  In these groups, students  will plan a mini-lesson and/or interactive activities to use with their learner groups to teach them about their particular transformation.
  • Once ready, students will return to their learner (original) groups and take turns sharing their expertise on their transformation with the rest of the group.

Assessment: Students will complete a HW assignment to apply their newfound knowledge. The next day, they will return to their learner groups to compare and contrast answers, resolve issues, clarify questions, etc. Experts can revisit any topic for which it is apparent there were issues. One paper will be collected from each learner group for a homework grade.

Assessment: Transformations will be tested on a future test to check for understanding by individual students.


Teacher notes:  Teachers may wish to consider assigning students the transformation they will study rather than allowing groups to decide.  While allowing the students to decide encourages ownership and can increase motivation, the difficulty level of transformations can vary widely between, for example, translations and dilations.  Teachers could assign topics based off of student strengths within each group.

Posted in Cooperative Learning | Tagged , , , | 63 Comments

Cooperative Learning Lessons-Coldiron

Cooperative Learning Lessons

4th grade Pop Art Study/ Gallery Show

CO-OP CO-OP

Student-centered discussion: Students sit at their regular tables of four and find four very different examples of Pop Art by four different artists. Each work will be numbered 1-4. Students are asked to spend 10 minutes discussing which work is their favorite, and how each work is different, recording their answers in their art journal.

Standards:

3PE Compare and contrast art forms, techniques and functions and artistic styles from a variety of cultures and historical periods

3PR Generate ideas and employ a variety of strategies to solve visual problems.

3RE Recognize and describe the relationship of artworks to their social and cultural contexts.


Materials: Laminated examples of Pop Art in different styles, Oil pastels, Gloss print magazines, glue sticks, scissors, pencils, mounting board, colored construction paper, rulers, paper scrap bin, slips of paper for evaluation

Timing: This lesson is designed to take three days.

Day 1: students will spend 15 minutes discussing the art work and recording the similarities and differences  in their art journal. Then students will divide into groups based on the art work they were most interested in. For the remaining portion of the class students will plan with their group what the main theme behind their work will be and how each of their works will fit in to the bigger picture. They will then draw a mock up of their portion of the work.

Day 2: students will use a verity of materials to create their piece keeping the chosen style of the group in mind; often comparing and piecing their work together with others from their group.

Day 3: Students will present their art work to the class, and rate the final work of their classmates.

Team selection: Students will individually choose a favorite work. Based on the assigned number of the work students will be grouped by the art work that interested them the most to promote their natural curiosity about that style.

Separation and delegation of work: As a group, students will study the Pop Art piece they have chosen and identify and record the following.

Examples of different Pop Art Styles

Love, Robert Indiana

Photo Montage, Culture Trip, Richard Hamilton

Retroactive II, Robert Ruschenberg

Quadriptych, Andy Warhol

Diptych, Whaam, Roy Lichtenstein

  • Art elements present in the work
  • The subject of the work
  • A color scheme for the work

After studying the work students will create their own piece to be presented to the class in the form of a quadriptych (an artwork which is divided into four sections). This was a common practice by Pop Artists. Students will give each other verbal feedback on each team members work and problem solve to produce a congruent piece. Students will use the records from the original art work to help give their piece a common theme, whether that be color, subject, or another part of the piece the students find interesting.

Diptych, Campbell’s Soup Can, Andy Warhol

Quadriptych, Miss Monroe, Andy Warhol

Team presentations: Each group will present their final work to the class in the form of a quadriptych for groups of four, Triptych for groups of three, or Diptych for groups of two. Each student will then describe their piece to the class and share how their work relates to the other members of their team. Students will need to outline the key features of the art work they choose for inspiration. They may also choose to present their work in other ways if it enhances the work.  Below are a few examples.

  • Comic Strip
  • Advertisement
  • Wrapper
  • Label
  • Diptych/Triptych


Evaluation: This assignment will have to forms of evaluation.

Evaluation 1: Individual students will self-evaluate using a rubric, rating their team 1-4 in teamwork, communication, creativity, and clean up. In addition, they will have three short answer questions. What was your biggest contribution to the group? What do you feel ties all of your works together? Is there anything you would change about the work?

Evaluation 2: Each team’s work will be hanging in a long hallway outside of the classroom; it will be set up as a gallery. Students will be given a slip of paper for each team and asked to rate each group project based on craftsmanship, and creativity with a score of 1-4. Similar to STAD team recognition will be given to the top three teams, and their work will be featured in the hallway display case.

Social Media

What is Pop Art?

Quadriptych Elementary Art Roy Lichtenstein Style

https://www.pinterest.com/pin/AeBcRVh3EK304PyIWmnZi1QcrdU1vHkRRqY0pxdKRaEsGfK6tM1dqhY/

Quadriptych Elementary Pop Art Flower

https://www.artsonia.com/museum/gallery.asp?project=1367503


2nd Grade Chihuly Sculpture/If You Build It Team Building Lesson

At the beginning of the year I introduce different examples of art work, such as painting, drawing, sculpture and pottery. We typically have a discussion about what students want to learn for the year and their favorite activates in art class.  I would like to start next year with the team building activity If You Build it. It would give students a chance to form a bond with other students at their table and in their new class.

Lesson Outline: For this lesson students will be introduced to glass sculpture. Focusing on the art elements of color, form and learn about the art vocabulary used in sculpture. Students will be asked to build a sculpture out of recycled materials as a team.  Students will first draw a sculpture using color pencil, drawing inspiration from different Dale Chihuly sculptures displayed on the board.

Standards:

3PE Compare the form, materials and techniques in selected works of art using descriptive language.

3PR Create artworks based on imagination and observation of familiar objects and scenes.

3RE Relate the subject matter and ideas in their own artworks to those in the works of others.

Materials: Color pencils, pencils, erasers, art journal, Clear plastic recycling i.e fruit cups, water bottles, Ziploc bags, plastic cups, and plates, scissors, zip-ties, paper clips, multi color sharpies, twist ties, clear plastic tape, string, hole punch, boxes wrapped in white paper for display, slips of paper for assessment

Timing: This lesson is designed to take two days.

Day 1 : Students will begin the first 15 minutes of class discussing different kinds of glass art they have seen. They will watch a video about an art insulation by Dale Chihuly, and talk about what they saw and what they found inspiring. Students will then work for the remaining time in the class with their table to pick materials and start to build a sculpture.

Day 2: Students will use the first 25 minutes of class finish work on their sculpture adding finishing touches and discussing any changes they wish to make. They will have 15 minutes to figure out how they wish to display their project whether they wish to hand it, or sit in on a pedestal. During the remaining 10 minutes of class they will rate the sculptures made by other 2nd grade classes.

Laguna Torcello, Dale Chihuly

Mille Fiori, Dale Chihuly

Confetti Anemone Wall, Dale Chihuly

Key Topics

  • Color
  • Form
  • In the Round, sculpture in which the figures are presented in complete 3D form and are not attached to a flat background
  • Recycling
  • Molten Sand=Glass

Separation/Delegation of work Students will work in sets of four or five based on their assigned table. Each student will find a water bottle of other plastic material from the recycled materials box  and then deciding as a group how they wish to attach their work, how they will display it, and what job each student will fill. They are welcome to divide jobs on their own however if a group needs more guidance they may choose to go with a set of jobs listed on the board by the teacher.

  • Color Chief
  • Bottle Cutter
  • Builder
  • Display Designer

Evaluation: Student work will be on display from the other 2nd grade classes. Each class will rate a different class on team art work. Students will rate each work 1-4 in creativity. This will help reduce favoritism. Teams will also give themselves a rating on respect, listening, helping, and creativity, filled out individually by each team member.

Here is an example of a school wide sculpture we did last year as part of pride week. All the work including construction was done by the students grades K-5th. Through having students collect the water bottles from home the school was able to recycle 15 full garbage bags of plastic bottles outside of the sculpture. I hope to do the same after this lesson, because our community does not offer recycling services.

School Wide Project, Inspired by Dale Chihuly


Social Media 

Dale Chihuly, Installation Art, Through the Looking Glass

https://www.youtube.com/watch?v=fNVo3Vp5VOQ

Recycled Glass Turned in to Glass Pitcher


Examples of Elementary Recycled Sculpture


Posted in Cooperative Learning | Tagged , , , , , , | 262 Comments

Cooperative Learning Strategies – Burtis

All students need the ability to work cooperatively with others. Whether they are the trainee, or the trainer, working together is necessary. Jigsaw is a method that really tackles that aspect. The student must take ownership in learning their piece of the puzzle, and then be able to communicate that learning to their peers. Finding a topic in Algebra that has several independent pieces to be able to utilize the Jigsaw strategy is another thing altogether. While Jigsaw is not a method that could be used often in an Algebra class, due to the nature of topics building on what came before it, I believe it can be effective strategy in certain areas.

As for team-building. I have participated in team building when in the corporate world. I have participated and conducted team building with various teams I have coached. I had never thought about using it in the classroom to help facilitate students working together. Sometimes good ideas are hiding in plain sight…

Cooperative Lesson – The Family Picnic2  –  (Jigsaw)

Topic: Properties of quadratic functions

Duration: 4 class periods

Student Goals:

  1. I can convert a quadratic equation from standard form to vertex form.
  2. I can discover properties of a quadratic equation by looking at the equation in vertex form.
  3. I can graph a quadratic equation from vertex form.
  4. I can work with my team to reach the above goals.

Materials:

  • Packets for discovery and development of the “Experts” and problems for them to work on. The packets can be a discovery lesson, using Desmos to discover what changes to the equation do to the graph, a Powerpoint, videos to watch (including but not limited to Khan Acacemy), or a combination.
  • Problem for the Experts to use when teaching their team. Will vary by teacher and class. Some may need guided notes included with a problem set, some may be able to do the discovery lesson that the Experts used and only need a problem set.
  • Paper (regular and graph) and pencil for taking notes.
  • Video links (as possible supplements to the packets for the Experts).
  • Headphones – if one to one and videos an option, need to keep the noise level down.

Scenario: The class has already established teams of 5 from earlier cooperative work. They will be in their teams for most of this unit.  So that students cannot pick and choose a segment that they think is easier or harder, I will present it in a different format.

THE PLAN: Day 1

Lesson Introduction: Everyone has a been to a family picnic, whether their own family or as a guest at someone else’s. There are some dynamics that show up at these gatherings! (at least there is in my family!)

  1. First, there is the organizer: the one who makes sure everything and everyone is there.
  2. Second is the early bird: someone always seems to show up early.
  3. Third is Mr./Mrs. punctual: they are always on time and hang around in the middle of things.
  4. Fourth is the fashionably late person: holds up things and bring up the rear.
  5. The photographer: someone is always taking pictures, whether on their phone or with their camera.

Each team member assumes one of the 5 roles. Decide now… (5 minute limit)

Once everyone has a number/role, they will group by their numbers to become the Expert on their topic. The topics that accompany each role are:

  1. Organizer: Converting standard form to vertex form, finding the vertex, and finding the y-intercept.
  2. Early Bird: study what “a” tells you about the function.
  3. Punctual: study what “h” tells you, determining the domain, and the axis of symmetry.
  4. Bring up the rear: study what “k” tells you and how it tells the range.
  5. Photographer: study how to graph from vertex form.

The rest of the class will be spent grouped by topic, with them working through the packets and videos to make sure that they understand their topic well enough to teach it to their teammates, and devising a plan for how they intend to do that. They will be told that they get a maximum of 15 minutes to teach their topic. Homework is finalizing that plan. Wrap up the last 10 minutes of class with a quick quiz to make sure the Experts are in fact experts.

The Plan: Day 2

The experts teaching their teams will take 2 days. So, on the 2nd day of the unit, the three  middle topics will be taught:

  1. Effects of “a”
  2. Effects of “h”, and the domain
  3. Effects of “k, and the range.

Stress the need for the students being taught to take notes as their teammate teaches. The students will group into their 5 person teams. I will let the Experts decide who goes first, but will recommend alphabetical order. Each student will get 15 minutes to teach their topic to the team. I will call out time every 5 minutes (or project the timer onto the board) so they can time themselves.

At the end of class, they will take a quick quiz over the three topics they learned about. (3-5 questions at most)

The Plan: Day 3

The second day of the teaching will cover the topics of:

  1. Converting from standard form to vertex form, finding the axis of symmetry, and finding the vertex.
  2. Graphing from vertex form

After the 30 minutes of instruction, the students will take another short quiz, covering the two ideas they learned today. (Again only 3-5 questions)

As a wrap-up to the Jigsaw, I will have the students write a short reflection paper answering the questions:

  1. How did your “Expert” groups work together? What was one positive and one negative thing about it?
  2. How did your team work together? What was one positive and one negative?
  3. Would you like to do this on other topics? Explain your answer.

They can work on their paper for the remainder of class, and finish up as homework, due at the start of class the next day.

The Plan: Day 4

Materials: White board and markers, packet of review questions.

Start class with a 5- to 10-minute whole class Chalk Talk. The prompt: “Properties of Quadratics”.  This is so the teacher can get a feel for anything that may need to be revisited.

The rest of the period is a work/review activity, reviewing and working on problems in their teams and trying to iron out any issues students may have. Since there is an Expert on each topic in each team, questions should be able to stay within the team. Teacher is circulating through the room for anything that needs their input. This day is entirely about preparing for a more substantial quiz over the unit that will happen on Day 5.

Supplemental Materials:

The following links are a few of the possible videos that could be in the Expert groups, or that could be given to the class as supplemental material should any feel the need for some extra help.

 https://www.youtube.com/watch?v=y99lNRqLjBA  (graphing)

https://www.youtube.com/watch?v=FezeWsRrJz0  (std to vertex)

https://www.youtube.com/watch?v=gnw95KLxPkw  (a,h, and k)


Cooperative Lesson – Team Building

Topic: Team Building

Duration: 2 days (+)

Student goals:

  1. Learn to work with your teammates
  2. Learn about your teammates
  3. Learn to communicate with your teammates
  4. Create an identity for your team

Materials:

  • Will vary by task

Scenario: The class has been split into teams of 4 or 5 (depending on the number of students in your class). Now you want them to get to know each other and become a team that can talk to each other, depend on each other, and work together. Teacher note: my lesson assumes 5 per group. You can adjust accordingly.

The Plan: Day 1:

The first day is designed around the students getting to know their teammates, learning to help each other, and learning the art of communication.

  • Task #1 – Scavenger Hunt. (15 minutes total)

Goal: Working together

Materials: the handout with the questions and a writing utensil.

Teacher notes: I happen to have 60+ posters in my room. They vary from Math related (the majority), problem solving and test taking, slogans and comic relief, and pictures of beautiful scenery with slogans on them. If things are not the same in your room, maybe there is a room in the school that you could use for this exercise.

Each team will receive a handout that has 10 questions on it. The answers are on the wall! They have ten minutes to answer their set of questions.  Teacher will circulate, looking for which teams work together, which divide it up, which pairs off and works…

Teacher notes: Try to make sure that there are very few questions that are on multiple teams’ worksheets, so they can only depend on their teammates. Try to put questions that will require them to scour all four walls. Putting a time limit adds a little stress and the need to help each other.

  • Task #2 – Blind Draw

Goal: Communication and creative thinking

Materials: paper and pencils, multiple pictures of simple drawings (see examples below), handout of questions for homework.

  • Arrange the desks such that four students are sitting back to back, they cannot see each other’s desk top. They need a pencil and sheet of paper. The students that are drawing are NOT allowed to talk during the task!
  • The fifth student is handed a folder with a picture inside of it. It is his job to describe the picture for his teammates to draw. He cannot use any names of logos or companies or reference anything that may give the picture away. He cannot tell what it is.
  • The goal is NOT drawing a good picture because you know what it is. The goal is following your teammates directions and ending up with a good picture that is close.
  • Once the student talking opens the folder, they have 4 minutes to complete the drawing.
  • Then reveal all the drawings and take 2 minutes to discuss the process.
  • The person who spoke first trades places with one of his teammates and they do the process all over.
  • Repeat the process until all the teammates have had a turn as the speaker.
  • Keep the original and all drawings together in the folder. They will be discussed tomorrow.

Below are some examples of the drawings that could be used. Nothing fancy, uses basic figures, but requires some thought to communicate. Can use anything you feel appropriate, just make sure it’s something your students can communicate. I try to stay away from easily recognized logos and figures.

Homework: Fill out the handout that asks information about the student (i.e. Favorite book? Favorite band? Brothers and/or sisters? Favorite subject? Topic in Math they like? Topic in math they do not like? Hobbies? Extra-curricular activities?) Teacher note: this is just to facilitate Day 2, where they will learn about each other, so you can tailor the questions to whatever you deem appropriate based on age of class.

The Plan: Day 2

Start the day by having the teams debrief the drawing exercise from yesterday. What could they have done different? What directions were unclear? Did they get better in the 4th and 5th attempt? Why or why not?

Give them 10 minutes to do this, with someone taking notes addressing the questions.

  • Task #1 – Naming Rights/classification (15 minutes)

Goal: Get to know your teammates

Materials: Worksheet each filled out individually.

Start by having the students share out some of their answers. Remind them of the decorum expected and to keep things positive! During this 15-minute discussion, they are trying to find some common ground among the team member. The end goal is to come up with a name to represent their team. (examples: night owls, early birds, burger lovers, etc.) Remind them no negative, prejudicial, or discriminatory terms can be in their name…

  • Task #2 – Make a logo for your team.

Have them take a blank sheet of paper and devise a logo for their team. It should be simple artistically, but incorporate some of the ideas and likes that they share. The logos will be colored in, laminated, and displayed in the room.

Teacher note: The naming and branding may take longer than 40 minutes, so hopefully you have some wiggle room to allow them to finish up in a Day 3. It is important they get to express themselves and cutting them off before finishing would end an otherwise positive process on a negative.

Possible Extention: I cannot take credit for this idea, it came from a colleague’s idea. If you have that extra day available, your students are versed in using Desmos, and wish to involve some mathematics into the team-building, have the students use Desmos to convert their hand-drawn logo into a creative, equation driven, picture that can be displayed in the room. 

Supplemental Materials:

https://www.youtube.com/watch?v=0ljUwv48-70 (Blind drawing)

https://www.youtube.com/watch?v=8yGhNwDMT-g (blind drawing)


Posted in Cooperative Learning | Tagged , , , | 13 Comments

Walters-Cooperative Learning

TEAM BUILDING Lesson:

This team building activity is for the beginning of the school year as I introduce the idea of critical thinking skills in the math classroom.  I would organize my groups within my classroom in groups of 4 people.  This is called the Paper Tower Challenge.  Each group is given:

  • 2 sheets of 8.5 x 11 paper
  • 40 centimeters of tape
  • 1 pair of scissors
  • 1 pencil
  • 1 – 12 inch ruler

The goal of the group is to build the tallest tower.  The one rule is that the tower can not be taped on the desk or wall.  Each member of the group is responsible for a certain supply to make sure that all are participating.  For example, one person is in charge of the tape and they are the only one who can distribute out the tape.  At the end of this activity, we discuss what it looks like to work well as a group and what qualities should always be included in group work.

Here is an example you could show the class when they are FINISHED with their. (I wouldn’t show it before hand or they may try to just copy this idea)


COLLABORATIVE LESSON (Statue of Liberty):

I used the CO-OP CO-OP model for this activity.  We have been working a lot with proportions in my 7th grade class as well as scale factor before this activity/lesson is introduced.  Students are NOT told to use Proportions in this lesson as they can use any strategy that they would.  However, most students end up using proportions in this.

Student Centered Discussion

  • We begin this activity by a picture of the Statue of Liberty is placed up on the Smart Board
  • We will do a See, Think, Wonder before we begin class discussion
    • What is it that you See?
    • What do you think about the Statue of Liberty?
    • What do you wonder about the Statue of Liberty and how it is created?
  • We will talk about what we know about the Statue of Liberty and how we think Math plays into the creation of the Statue of Liberty.
  • Then the question is posed (1)“If I know that the Statue of Liberty has a nose that is 4ft, 6 inches long, find the length of her pinky finger, how tall she is, and the length of her right arm.” (2) How does this compare to another well known statue?


Team Selection

  • All groups will be focusing on question (1) with the Statue of Liberty.  Then, the other well known statues they will be looking at are listed below. Students will form groups based on the other statue that they are interested in.
    • Marianne in Jonzac

  • Mount Rushmore

  • Christ the Redeemer

  • Great Sphinx

  • Lincoln Memorial

Separation and Delegation of Work

  • Each group will be focusing on 2 different body parts of the Statue of Liberty.  Research will have to be closely monitored as we don’t just want them googling what the lengths are and writing them down.  There has to be mathematical proof to their answers that they come up with.  They are allowed to look up the history and other background knowledge if they would find that to be helpful.
  • Once they find their measurements for the Statue of Liberty, they will then compare these measurements to the statue that they chose.  They will need to find the scale factor of how much bigger or smaller the Statue of Liberty is to the other statue.  They are allowed to do research on the other statue.

Presentation:

  • Each group will be responsible for presenting their findings to the class, whether that is in poster board form, Google Slides, and other resources.

Evaluations:

  • Students will be evaluated on their presentations, their collaboration as a group, and their mathematical calculations.  This project will be worth 25 points (10 on presentation, 10 on Mathematical calculations, and 5 on their collaboration as a group).
Posted in Cooperative Learning | Tagged , , | 24 Comments