MTV Strategies: Booth

Lesson Plan #1

Standards:

  • RL.4.3 Describe in depth a character, setting, or event in a story or drama, drawing on specific details in the text (e.g., a character’s thoughts, words, or actions).
  • RL.4.6 Explain the differences in the point(s) of view in a text and different perspectives of the characters.
  • H.4.3 Sectional issues divided the United States after the War of 1812. Ohio played a key role in these issues, particularly with the antislavery movement and the Underground Railroad.
  • SL.4.1 Engage effectively in a range of collaborative discussions (one-on-one, in groups, and teacher-led) with diverse partners on grade 4 topics and texts, building on others’ ideas and expressing their own clearly.
    • c. Pose and respond to specific questions to clarify or follow up on information, and make comments that contribute to the discussion and link to the remarks of others.
    • d. Review the key ideas expressed and explain their own ideas and understanding in light of the discussion.

Objectives:

  • I can explain the different perspectives of the characters in Freedom’s Wings: Corey’s Underground Railroad Diary using specific details in the text.Image result for freedom's wings corey's underground railroad diary
  • I can effectively engage in a collaborative discussion with my peers expressing my own opinions and responding to others’ ideas.

Lesson:

  • I would divide the students into 6 groups. Each group will be assigned to a different character in the novel such as:
    • Master Bob Hart
    • Young Bob (Master Hart’s Son)
    • Roland (Corey’s Father)
    • Mama (Corey’s Mother)
    • Mingo (Fellow Slave)
    • Mr. Renfield (Conductor on the Underground Railroad)
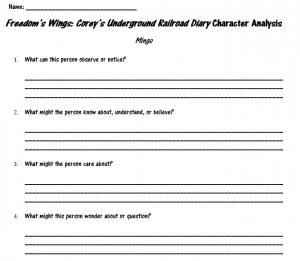
  • Each student would have to complete a form such as the one below independently. Each student in the group will answer the following questions which can be found on pages 179-180 in Making Thinking Visible. (Ritchart et al., 2011)
    • What can this person observe or notice?
    • What might the person know about, understand, or believe?
    • What might the person care about?
    • What might this person wonder about or question?

  • The students would then share their responses with their groups and have a discussion about their responses. I would have the quote, “What makes you say that?” posted at each group to guide the students in their discussion.
  • We would come together as a whole class and the students would then share their responses and I would record their responses on a large sheet of paper to display in my classroom as we finish the unit.

Assessment

  • My assessment would be based on what the students wrote down on their forms. I would also be actively conferencing with each group to make sure they were having meaningful discussions. I would record their interactions on a document similar to the one that can be found at https://www.pinterest.com/pin/272116002464540858/ so that I would be able to monitor their thinking process and be able to interject when necessary. 

Materials

  • Freedom’s Wings: Corey’s Underground Railroad Diary by Sharon Dennis Wyeth.
  • Forms to record student responses
  • Large paper to record all student responses

Next Steps:

  • The following day I would have students write a journal entry that could be included in the diary written from another character’s perspective of their choice. I would also use the record of what I wrote while conferencing with each group to guide them in their writing.

Lesson Plan #2

Standards:

  • RI.4.1 Refer to details and examples in a text when explaining what the text says explicitly and when drawing inferences from the text.
  • RI.4.2 Analyze informational text development.
    • a. Determine the main idea of a text and explain how it is supported by key details.
    • b. Provide a summary of the text that includes the main idea and key details, as well as other important information.
  • RI.4.4 Determine the meaning of general academic and domain-specific words or phrases in a text relevant to a grade 4 topic or subject area.
  • SL.4.1 Engage effectively in a range of collaborative discussions (one-on-one, in groups, and teacher-led) with diverse partners on grade 4 topics and texts, building on others’ ideas and expressing their own clearly.
    • c. Pose and respond to specific questions to clarify or follow up on information, and make comments that contribute to the discussion and link to the remarks of others.
    • d. Review the key ideas expressed and explain their own ideas and understanding in light of the discussion.

Objectives:

  • I can refer to details and examples in the article when explaining my own thinking.
  • I can analyze the article and provide the main idea of the article. I can then provide a summary of that article using details from the text.
  • I can effectively engage in a collaborative discussion with my peers expressing my own opinions and responding to others’ ideas.

Lesson:

  • I would divide the students into different groups with each group assigned to a different civil rights article with topics such as Martin Luther King Jr., Rosa Parks, Little Rock Nine, Brown vs. Board of Education, etc. which I found at https://www.teacherspayteachers.com/Product/Close-Reading-Task-Cards-The-Civil-Rights-Movement-2403016.
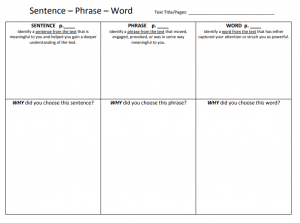
  • I would have the students each read the article they were given and have them discuss with their groups what their thoughts were while reading the article. I would then have the students write down on a graphic organizer what sentence, phrase, and word they chose independently which I found on the website: http://www.rcsthinkfromthemiddle.com/sentence-phrase-word.html. Once completed, they would have the opportunity to share with their groups.(If this lesson is not the first time the students did an activity like this, I would use the graphic organizer below, which can be found on the same website as above.)
  • The groups would then share their findings to the class and I would record their responses to display in my classroom. Afterwards, the whole class could have a discussion as to what the common themes were between the articles which we would also record.

Assessment:

  • My assessment would be based on what the students wrote down on their graphic organizer. I would also be actively conferencing with each group to make sure that they were having meaningful discussions. I would record their interactions so that I would be able to monitor their thinking process and be able to interject when necessary.

Materials:

  • Civil Rights Articles found on www.teacherspayteachers.com
  • Graphic organizer to record student responses
  • Large Paper to record all student responses

Next Steps:

  • The following day I would show the students a YouTube video such as the one below. https://www.youtube.com/watch?v=URxwe6LPvkM
  • I would then have students write a summary of what they learned using the word, phrase, and sentence that they chose the previous day. This would include knowledge of the article that they had to read and what they learned from other groups’ presentations.
Posted in Making Thinking Visible | Leave a comment

Lesson 1.) Using See-Think-Wonder in studying, “The Fall” 

Description of Lesson: In this 2 day lesson, 2nd grade ESL students analyze the elements of the season of fall. They recognize changes from summer, and changes again leading in to winter. This lesson uses a literacy component of our district’s curriculum resource, Storytown, as noted* in the lesson plan. The rest of it is my original work. 


ELP Standards 3: speak and write about grade-appropriate complex literary and informational texts and topics

Corresponds to CCSS: W-2,3   SL-4,5

I Can… recognize and describe changes we see in the fall.

Vocabulary of the Week:

fall   seasons   look   trees   color   leaves

Lesson Delivery

Day 1

1.) Review Goal Statement as a Group

Teacher points to goal statement written on board and class reads together. “I can recognize and describe changes we see in the fall.”

2.) Brainstorm with MTV Strategy: See-Think-Wonder

Teacher tells students to look at posted images around the whiteboard of fall. (These may include various colored leaves, people raking up leaves, Halloween jack-o-lanterns, and animals gathering food sources or animals sleeping.)

Teacher gives following prompt and questions:

“Fall is a time of change. What are some changes we see in the fall?”

  • What do you see?
  • What do you think about that?
  • What does it make you wonder?

Teacher calls on students, listens to their answers and writes them on the board in a sort of chart formation. See below right *. 

After 5 minutes of student brainstorming using See-Think-Wonder, we review answers as a group, confirming each idea in the context of “The Fall” and changes we can recognize.

3.) Teacher reviews vocabulary with students.

  • “Let’s read our Vocabulary words together.” Teacher reads vocabulary words that are posted on board aloud with the students.
  • “Can anyone try to read the words by themselves?” Teacher calls student up to front to try and read words to the group.
  • “Can anyone pick a word from the list and use it in a sentence?” Teacher calls on 5-10 students, one at a time to use a word in a complete spoken sentence.

4.) Read Text Together: “The Fall” *Leveled Reader #2 from Storytown Series and follow with *Storytown Comprehension Questions:

  • What happens to trees in the fall? (In the fall, leaves change color and fall off trees.)
  • Why do animals eat as much food as they can in the fall? (In the fall, animals eat as much food as they can because they are filling their bellies for winter.)
  • What is an animal’s fur like in the fall? (In the fall, an animal’s fur is thick.)
  • Why does a snowshoe rabbit’s fur grow white? (A snowshoe rabbit’s fur grows white because that helps the rabbit hide in the snow.)
  • What do snakes do in the fall? (In the fall, snakes look for holes in rocks.)
  • What do bears look for in the fall? (Bears look for caves in the fall.)

Day 2

1.) Review Goal Statement as a Group

Teacher points to goal statement written on board and class reads together. “I can recognize and describe changes we see in the fall.”

2.) Brainstorm with MTV Strategy: See-Think-Wonder

Teacher tells students to look at posted images around the whiteboard of fall. Again the teacher gives following prompt and questions:

“Fall is a time of change. What are some changes we see in the fall?”

  • What do you see?
  • What do you think about that?
  • What does it make you wonder?

This time the students write their answers directly on the board, instead of the teacher writing them on the board.

After 5 minutes, review as a whole again and the teacher corrects any spelling mistakes. Keep this and use this chart as guidance for writing about our ideas later on. (Teacher could take picture to project later.)

3.) Review Vocabulary – same as day 1

4.) Comprehension Worksheet: Students fill in teacher create worksheet to label pictures, fill in the blank sentences, and a paragraph using the vocabulary words.

5.) Journal: Provide students with paper that includes writing lines on the bottom haf and open drawing space on the top half. Ask students to: “Describe 3-5 changes you see when summer turns to fall. Use all the vocabulary words and underline them. When you’re finished writing, check your work for mistakes and then you may draw a picture of your thoughts on fall changes.”

6.) Share/Reflect: If time allows, share Journal Entries.

Meharry, Dot (2008.) Storytown: The Fall. Location Unknown: Harcourt School Publishing.

_______________________________

Lesson 2.) Using The Explanation Game in studying, “Lots of Dogs”

Description of Lesson: In this 2 day lesson, 2nd grade ESL students analyze the physical characteristics of dogs. They categorize dogs and make connections between different kinds of dogs’ physical qualities and the purposes that they might serve. This lesson uses a literacy component of our district’s curriculum resource, Storytown, as noted* in the lesson plan. The rest of it is my original work.

ELP Standards 2: Participate in grade-appropriate oral and written exchanges of information, ideas, and analyses, responding to peer, audience, or reader comments and questions

Corresponds to CCSS: W-6   SL-1

I Can… categorize different kinds of dogs by their physical qualities.

Vocabulary of the Week:

dogs   different   kinds   hair   legs   pet

Lesson Delivery

Day 1

1.) Review Goal Statement as a Group

Teacher points to goal statement written on board and class reads together.

“I can categorize different kinds of dogs by their physical qualities.”

2.) Brainstorm with MTV Strategy: The Explanation Game

The teacher would use The Explanation Game strategy in that students would see posted images of dogs around the whiteboard and lead with the following prompt and questions:

  • Name It: “There are many different kinds of dogs. Look at the dogs. Name a characteristic of each dog.” I would write the characteristics next to the dog.
  • Explain It: “What could be the role or function of their characteristics? For example, a chihuahua has big open ears so he can hear any disturbances and then bark to sound an alert.”
  • Give reasons: “What makes you say that? Have you experienced this before or seen another animal act this way before?”
  • Generate alternatives: “What other special attributes does that dog have?”

Teacher calls on students, listens to their answers and writes them on the board in a sort of chart formation. While doing this, as a group, we would converse to confirm or extend each idea in the context of “Lots of dogs” and characteristics we can recognize.

3.)  Teacher reviews vocabulary with students.

  • “Let’s read our Vocabulary words together.” Teacher reads vocabulary words that are posted on board aloud with the students.
  • “Can anyone try to read the words by themselves?” Teacher calls student up to front to try and read words to the group.
  • “Can anyone pick a word from the list and use it in a sentence?” Teacher calls on 5-10 students, one at a time to use a word in a complete spoken sentence.

4.) Read Text Together: “Lot’s of Dogs” *Leveled Reader #3 from Storytown Series and follow with *Storytown Comprehension Questions:

Comprehension Questions:

  • What can a dog with long legs do? (A dog with long legs can run fast.)
  • What can a dog with short legs do? (A dog with short legs can dig.)
  • How can a dog help a farmer? (A dog can help a farmer move sheep.)
  • How can a dog help a person who cannot see? (A dog can help a person cross the road.)
  • What animal makes a good pet? (A dog makes a good pet.)

Day 2

  • Review Goal Statement as a Group

Teacher points to goal statement written on board and class reads together.

“I can categorize different kinds of dogs by their physical qualities.”

2.) Brainstorm with MTV Strategy: The Explanation Game

On day two of the lesson, the teacher asks the following questions again:

  • Name It: “There are many different kinds of dogs. Look at the dogs. Name a characteristic of each dog.” I would write the characteristics next to the dog.
  • Explain It: “What could be the role or function of their characteristics? For example, a chihuahua has big open ears so he can hear any disturbances and then bark to sound an alert.”
  • Give reasons: “What makes you say that? Have you experienced this before or seen another animal act this way before?”
  • Generate alternatives: “What other special attributes does that dog have?”

This time the students write their answers directly on the board, instead of the teacher writing them on the board.

After 5 minutes, review as a whole again and the teacher corrects any spelling mistakes. We would then make connections between the dogs, encouraging quick compare and contrast discussions about how certain dogs have attributes that others don’t have, and why that might best serve them in their environment.

3.) Review Vocabulary – same as day 1

4.) Comprehension Worksheet: Students fill in teacher create worksheet to label pictures, fill in the blank sentences, and a paragraph using the vocabulary words.

5.) Journal: Provide students with paper that includes writing lines on the bottom haf and open drawing space on the top half. Ask students to: “Analyze and describe 3 different types of dogs. Tell how their qualities help them perform different tasks. When you’re finished writing, check your work for mistakes and then you may draw a picture of your thoughts on lots of dogs.”

6.) Share/Reflect: If time allows, share Journal Entries.

Cartwright, Pauline (2008.) Storytown: Lots of Dogs. Location Unknown: Harcourt School     Publishing.

Additional Dog Images below to print and post:

Labrador


Pekinese

Shih Tzu


Afghan


Sheep Dog


Pug

Terrier

Bull Dog

Posted on by hamestka | Leave a comment

MTV Strategies – Whalen

This blog contains 2 lesson plans for an English II Honors class.  I decided to use the Headlines and Circle of Viewpoints MTV strategies for my Lord of the Flies unit and my All the Light We Cannot See unit, respectively.

These are both built for classes of about 20 students, 45 minutes per class.

Lesson Idea 1 – Headlines for Lord of the Flies Psychology Connection


Objective: Students will be able to relate the content of an informational text back to the unit novel, Lord of the Flies.

Prior Knowledge:  Students must have read chapter 1 of Lord of the Flies, so they can see how the boys chose Ralph as the leader.

Outline: 

  1. Answer any comprehension questions about chapter 1
  2. Go over annotation strategy in class (Silver Dollar Annotation)
  3. Introduce psychology topic (The Halo Effect) by showing a Youtube video demonstrating The Halo Effect in action
  4. Pass out the informational text explaining the Halo effect and why people fall victim to it
    1. have students annotate using the Silver Dollar Method as they read the text
  5. After they are finished reading they make a headline for the article
    1. The headline must connect the content of the article back to Lord of the Flies.  (Ex: “Stranded Boys Vote for Looks over Leadership”)
  6. Lastly, we’ll compile these headlines on a big sticky note poster at the front of the room, surrounding the name of the psychology topic.  This can be displayed for the duration of the unit.
  7. As the headlines are compiled we can have an informal discussion behind the students thinking as to why they wrote the headline they did (why is this material important?)                                                                      

Standards:

RI.9-10.2 Analyze informational text development.
a. Determine a central idea of a text and analyze its development over
the course of the text, including how it emerges and is shaped and
refined by specific details
b. Provide an objective summary of the text that includes the
development of the central idea and how details impact this idea.


Assessment: I will assess the headlines students create based on their accurate connection of the psychology topic to its context within the text of the novel. Rubric:

Out of 9 points –

Does the headline make sense (grammatically and content wise)? 3 points

Does it directly connect to Lord of the Flies? 3 points

Does it directly connect with the informational text? 3 points

Materials: 

  • Silver Dollar Annotation Outlines/Instructions (handout)
  • The Halo Effect Youtube Video and projector-
  • The Halo Effect Informational Text (handout)
  • Pen/Pencil and highlighters
  • Large sticky note poster and markers


Lesson Idea 2 – Circle of Viewpoints for All the Light We Cannot See

All the Light We Cannot See is a WWII historical fiction that is partially told through the eyes of an orphan boy science genius who becomes a Nazi in order to get an education.  Students have a hard time wrapping their head around this story, because they feel sympathy for the character, but feel bad about that sympathy because he’s a Nazi.

I will project the following quote onto the board for the entirety of this lesson =

https://www.pinterest.com/pin/146367056616992541/

Objective: Students will organize and express their thoughts on Werner’s characterization by looking at the different perspectives and motivations of the story, then participating in a democratic discussion.

Outline: 

  1. Students will have read about half the book at this point.  I will start by asking the students their opinion of Werner and let them discuss superficially why they like/dislike him.
    1. I will guide this to incorporate the ideas previously discussed in a lesson about the perils of indifference, where we read the speech by Elie Weisel
  2. From there I will go into the Circle of Viewpoints activity.
    1. Students will be sorted into 4 groups with each being assigned one of 4 perspectives: Werner, Jutta (sister), Frau Elena (runs the orphanage), or Frederick (friend at Nazi school).
    2. Students will complete the activity, including the “I think…” and question from that viewpoint on a graphic organizer
  3. Then, I will have each group share their perspective one at a time for the class, taking notes on the board as I do so to focus the discussion.
  4. Then, we will have a whole class discussion about how indifference and morality play into/influence Werner’s character
    1. I will do this by giving the students 2 minutes to jot down their present thoughts/opinions about Werner and why
    2. Then I will open it up to a democratic discussion where the students are able to speak without raising hands, and share their thoughts, ask questions, etc.
      1. My desks are set up in a semi-circle, so I will have students quickly close into a complete circle for the end of class
    3. I will remind students to look at the Pinterest quote (which is from the novel) on the board and consider how that quote factors into their thinking

Prior Knowledge:  This lesson continues an earlier lesson on indifference (with the speech by Elie Weisel).

Werner tells himself to think of the people he’ll kill as “only numbers” – so we will analyze this perspective and his circumstances for how they relate to indifference, but they must have already read Weisel’s speech in order to do so.

This will be an activity we do after Werner leaves Nazi school and becomes a soldier.  Werner and the other characters have experienced enough development to lend to the discussion at this point.

Standards:

RL.9-10.3 Analyze how complex characters (e.g., those with multiple or
conflicting motivations) develop over the course of a text, interact with other
characters, and advance the plot or develop the theme.

SL.9-10.1 Initiate and participate effectively in a range of collaborative
discussions (one-on-one, in groups, and teacher-led) with diverse partners on
grades 9–10 topics, texts, and issues, building on others’ ideas and expressing
their own clearly and persuasively.
a. Come to discussions prepared, having read and researched material
under study; explicitly draw on that preparation by referring to
evidence from texts and other research on the topic or issue to
stimulate a thoughtful, well-reasoned exchange of ideas.
c. Propel conversations by posing and responding to questions that
relate the current discussion to broader themes or larger ideas;
actively incorporate others into the discussion; and clarify, verify, or
challenge ideas and conclusions.
d. Respond thoughtfully to diverse perspectives, summarize points of
agreement and disagreement, and, when warranted, qualify or justify
their own views and understanding and make new connections in light
of the evidence and reasoning presented.

RL.9-10.6 Analyze how a point of view, perspective, or cultural experience is
reflected in a work of literature from outside the United States, drawing on a
wide reading of world literature.

Assessment:  This lesson will be assessed based on the students’ active participation in the group work and the democratic discussion.  This will be graded holistically, with full marks given to those that actively participate and keep the discussion moving forward (not just saying “I agree,” but adding why)

Materials: 

  • All the Light We Cannot See novel
  • Projector and quote
  • Circle of Viewpoints graphic organizers, with specific spaces for the “I think” and the “I wonder”
  • Printed speech by Elie Weisel (? – might not be necessary)
  • Pen/pencil


Posted in Making Thinking Visible, Misc | Tagged , , , , , , , , | Leave a comment

Using MTV Strategies

“Around the Compass”

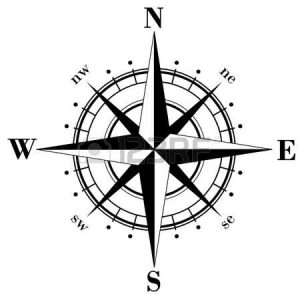
One of the events that this admission offices does annually is called Make It Miami. It’s for accepted students – we invite them on campus for an exclusive day of informative learning about the university to “seal the deal.” Our office is very data driven. We conduct surveys after each event to see what our participants liked/disliked and what can be improved. When compiling information to plan next year’s Make It Miami, the Compass Points can be extremely helpful. Given this strategy’s emphasis on decision making it makes for a good “checklist” in event planning. This is a process – not a recipe – to get to the end goal. This process happens every January as we prepare for the 10 Make It Miami events that span from February to April.

“Lesson Plan #1” for adding elements to this event using the Compass Strategy

Activity: adding bus route as an option to see campus

  • E – what excites you about this idea? Ability to offer an option to students/family members with disabilities to see the whole campus; option for participants who want to see the whole campus but are tired from a full day of events
  • W – what do you find worrisome about this idea? The buses break regularly and are not reliable. Will people even be interested? Is this investment unnecessary? What do we need to cut or reduce to make room in the budget for this?
  • N – what else do we need to know? How many people can ride on the bus? What times will be offered? Where will the bus go?
  • S – what should the next step in evaluation be? Suggestions? Stance? Given historical data and information received from comment card it seems like a great idea. We can try it for one or two events and see how it is received by the participants

  • This strategy allow colleagues the opportunity to discuss the proposal
    • Great tool for event planning meetings – explore the pros and cons. Go all around the compass to ensure you’ve researched all the possible outcomes and asked yourself all the necessary questions.

Image result for pros and cons

  • It’s important to include this MTV strategy because it allows you to keep moving forward. When documenting this process you 1. See the progress you’ve made and it’s encouraging and 2. Knowing the positive and negatives allows you to not fall back in learning/planning


  • There is also something to say about the process of writing things down – whether you’re in a classroom or work setting. It’s really easy to forget things floating around in your head. Even the simple task of writing something down can help your brain remember it. I know for myself, I have to write down all my appointments on my paper calendar or I will forget. Usually the simple act of writing helps me remember – I don’t even have to refer back to the calendar. Similarly, with this technique I think there’s something to be said about actually writing down your excitements and concerns. It really does make thinking visible. If it has any impact like the simple act of writing down my appointments in paper form, then MVP will make a huge difference. Not only is there a visual representation of thinking, BUT your brain remembers it too.
  • In terms of promoting equity in a work setting, this particular strategy encourages group thinking especially if used in a meeting. The series of questions allows the office to come together to answer them all and devise an event plan together

“Lesson Plan #2” – Explanation Game  

  • In a weird kind of reverse way, I encourage students who are prospective students to utilize the Explanation Game strategy when completing their application to university. I also use this technique while reading applications.
  • The main situation whereas I would use this technique as well as encourage a student to use it on an application would be in situations where the student had extenuating circumstances and it affected their high school performance
  • Example: Student suffered from depression and anxiety during their sophomore year *this is a made up scenario*
    • Name It – diagnosed with mental illness
    • Explain It – treatment caused student to miss multiple classes and fall behind in academics therefore GPA is suffering; student feels though they recovered physically their academics did not fully recover, etc.
    • Give reasons – parents got divorced and dog died all in one year; switched schools
    • Generate alternatives – student was overwhelmed with high school rigor and couldn’t keep up
  • This is a generic example but you get the overall idea
  • I also try to use this approach while reading applications to understand where students are coming from (within the context of their school/background)
    • Name what has caused this difference in their application
    • Explain it with the other information I am given
    • Give reason to why they stand out
    • Generate alternatives which ultimately leads me to a decision of “admit or deny”

Image result for understanding

  • “The explanation game works well with content that has various parts and features that seem to call out for closer examination, requiring students to make interpretations, and reason with evidence” (Making Things Visible, 102)
    • I love this quote because I think this is exactly what we look for in applications especially if it’s similar to the example I gave above. Maybe there’s a discrepancy with the application, but what have you learned from it and are you ready then for a rigorous university like Miami?
  • MTV is important because it allows you to see ALL sides of your progress and it holds you accountable to see things from all perspectives
  • In promoting equity with this particular situation, it allows me to continue to be a fair application reader

Image result for admission


Posted in Misc | Leave a comment

“Making Thinking Visible” in the 5th Grade ELA Classroom

Below are two lesson ideas using strategies from Making Thinking Visible: How to Promote Engagement, Understanding, and Independence for All Learners by Ron Ritchhart, Mark Church, and Karin Morrison (2011).

LESSON IDEA #1: Teaching making and adjusting inferences using “Zoom In”

  • An important reading strategy that my students develop throughout the year is making and adjusting inferences about a text. In order to better comprehend, good readers “read between the lines” to make judgments about characters, themes, and key ideas in a text (Robb, 2010).
  • The “Zoom In” strategy (Ritchhart, Church, & Morrison, 2011) invites students to make inferences and adjust them regularly as they are shown a different part of the picture.
  • Lesson idea: I think using Zoom In as a launch to a sequence of lessons about inferring would be really helpful for my students. Actually, there’s a really

    Seven Blind Mice by Ed Young; Image from penguinrandomhouse.com

    great picture book called Seven Blind Mice (Young, 1992) that I would use as a read-aloud introduction. In the book, these mice are inferring about this mysterious object (an elephant) and making predictions. Each time they see a new part of the object, they adjust their predictions. In the end, they realize it is an elephant.

  • After a brief discussion about the thinking that the mice were doing, I think I’d group students and have them participate in Zoom In as described in the text. I would maybe cut up images into 8-9 pieces and have students take turns pulling the cut up pieces out of a bag and inferring/predicting.
  • Finally, because application to a meaningful context is key, I would have students turn to their group’s common novel and record their inferences, predictions, and adjustments in writing.
  • An important equity note here is the way I ask students to respond. The very LAST way they respond is in writing. This lowers the barrier for many students who, for a variety of reasons, see writing as burdensome. First, they listen to the read aloud, then we process the text orally. Next, students think aloud as they infer, predict, and adjust while participating in a hands-on Zoom In activity. Finally, they do some inferring and predicting in writing, still with the support of their peers.
  • This thinking routine aligns perfectly with the critical reading strategy of inferring. I think the hands-on element I described above after the brief read aloud has potential to make the process of inferring visible.

Click here to see a different lesson from ReadWriteThink using Seven Blind Mice to teach the skill of analyzing multiple perspectives!

LESSON IDEA #2: Wondering about gender identity with The 4C’s

  • In the past, I have had students explore concepts of gender identity and the gender binary. There are many great titles in children’s literature on this topic-I especially endorse works by Lesléa Newman. Of course, with topics that question the status quo, I have found it to be critical to structure the lessons and activities in ways that emphasize non-judgmental questioning, wondering, and idea playing. I think the 4C’s model could be another valuable tool for me and my students in this work.
  • One valuable text I always use is William’s Doll by Charlotte Zolotow (1972). In this

    William’s Doll by Charlotte Zolotow; Image from wikipedia.com

    text, William would rather play with dolls than a basketball or trucks. William’s parents attempt to socialize him to perform as a stereotypical “boy,” but his grandmother allows him to play with dolls. Actually, one of the most powerful points for my students is when the grandmother points out that playing with dolls (and practicing caring for young) is important if William is to be a dad one day!

  • In a lesson…
    • I would read aloud William’s Doll and then ask students to create a 2 x 2 chart in their notebooks, labeled “connections,” “challenge,” “concepts,” and “changes” as defined by Ritchhart et al. (2011).
    • I would have students work individually first so that they could process their ideas — working individually first in this case honors the knowledges and beliefs all students bring to the text. I have found in the past that when I ask the group to process difficult topics in groups first, dominant voices tend to drown out the diversity of perspectives in the room.
    • Finally, the 4C’s chart could be a great tool to structure a productive conversation among peers and then group members as a response to the text.
  • As I mentioned above, using the 4C model, students can reflect individually on their own thoughts. In my mind, this structure promotes equity in terms of honoring students local knowledges that they bring to school.

For more ideas on wondering about gender identity and other social justice issues, explore the resources available from Teaching Tolerance at www.tolerance.org

References

Ritchhart, R., Church, M., & Morrison, K. (2011). Making thinking visible: How to promote engagement, understanding, and independence for all learners. San Francisco: Jossey-Bass.

Robb, L. (2010). Teaching reading in middle school. New York: Scholastic.

Young, E. (1992). Seven blind mice. New York: Philomel Books.

Zolotow, C. (1972). William’s Doll. New York: Harper & Row.

Posted in Making Thinking Visible, Social Justice | Tagged , , , , | Leave a comment

Project Based Learning/Creating a Coat of Arms-Coldiron

Project Based Learning/Creating a Coat of Arms 5th grade

Project Outline: This project will allow students to conduct research, use team work, problem solve, and use their creativity to learn about their families and develop a family identity. Students will learn about and work with their family to develop a coat of arms. They will identify meanings of different symbols, colors, and animals to create an image to represent their family. They will also be asked to distill that information into a family motto. If they already have a family motto that will have the option to create a new one. A letter will be sent home to parents explaining the assignment and will allow student with a fragile background to obtain from the family history potion of the lesson.  For students whose parents chose for them to be exempt will still create a coat of arms with their family influence.

Standards:

3PE Investigate the role of cultural objects in our everyday environment.

4PR Select and use the elements and principles of art and design to

communicate understanding of an interdisciplinary concept.

3RE Explain the reasons and value of documenting and preserving works of art and art

objects in some cultures

Timing: This project is designed to be worked on throughout the first quarter of the year. Students will work on the project during class time once every two weeks. Parts of the assignment will be worked on at home, such as family history research and family values. Students will learn about symbolism, heraldry, and the meanings of color during art class. They will finish their full-size coat of arms in art class for the last full week of the quarter, presenting their work at the family night at the end of October.

Materials: Poster board, glue, tempera paint, paint brushes, black permanent maker, water cups, smocks, rulers, scissors, colored construction paper, shield templets/examples, print offs of different animals, and symbols, information packet for parents, large scale examples of real coat of arms, internet access, History of Brown County, 1883.

Coat of Arms Outline

Challenging Problem or Question

Who are you?

Where does your family come from?

What questions do you have about your family’s history?

What is a coat of arms, (arms) and why is it important?

Sustained Inquiry

Students are to investigate the history of their family; who where their grandparents, their great grandparents, their family’s country of origin, and to find out what values their family holds above all else. Students will create a list of interview questions, to help answer the questions they have about their own family. They will need to conduct additional research into what their ancestors did, where they lived, and what their family does now.

Authenticity

Students will be asked to only include factual information in the written portion of their project because it will be submitted to the Brown County Historical Society as part of their genealogical records department.  Many of the students living in the district have families that have been in Brown county for over one hundred years. Students will have access to the History of Brown County, Ohio 1883. A book commissioned by the Library of Congress to record the history of Brown County and keep a Genealogical record. In addition, students are encouraged to find family photos that link their family to the region. These photos will be added to the archive for the Brown County Historical Society.

Heraldry Manuscript, Shield of Arms

Queen Elizabeth’s Coat of Arms

Porsche Coat of Arms

Student Voice & Choice

Students will choose colors, animals, and symbols to represent their family in creating a coat of arms. They will need to discover the meanings of each part they chose to include and explain why they have chosen such things in their art journal.  Using the answers from their interview they will develop what values are important to them and their family. They will use this to create the imagery to match those values by drawing mockup of their coat of arms.

What is a Coat of Arms?

starts at 19 seconds to 1 minute 40 seconds

Reflection

Students will write a list of their known ancestors from their research, including dates of birth and death. Then they will write a short paragraph about their favorite thing they learned during the project. Finishing by discussing why they chose certain colors and symbols for their shield.

Critique & Revision

Students will bring their coat of arms mockup home and discuss what choses they made, why they were made and any suggestions their family may have to help improve their work. After they have finalized their ideas students will begin their final coat of arms and create a full-size shield to represent themselves and their family. Their final project will include a poster with family photos, their life size shield, and a print off of their project reflection.

Public Product

Students will display their projects at the school’s family night/Rocket Pride Night. This will allow students to share the history and values of their family with the community. The written portion of each student’s project will be documented and submitted to the Brown County Historical Society for their genealogical records. In addition, any pictures of historical buildings and community gatherings will be digitized and given to the Brown County Historical Society as well.

Examples of Student Work


Assessment: Students will be evaluated based on their completed full-size Coat of Arms and their journal entry explaining their color and symbol choices. Students will self-assess first filling out a rubric rating themselves 1-4 on creativity, clean up, craftsmanship, and answer three short answer questions. The first being, what did you learn about yourself during this project, the second being, please explain what personal values your Coat of Arms represents, and third, what is a Coat of Arms and what is it’s use? The teacher will complete a rubric rating student’s short answers, written portion of the assignment and rating their use of symbols, colors, creativity, and craftsmanship form their finished piece.

Social Media:

Meanings of colors and symbols in heraldry

Different design examples for the shield of arms

https://www.pinterest.com/pin/AUl9ahFvLyD4jopEzHkXJ7kSBnDxfLxq4GmX8PLP4gp6oZMNO84a9ks/

Coming to America, book by Betsy Maestro


Examples of Coat of Arms in Architecture  

coat alteration.

Posted in Project-Based Learning | Tagged , , , , | 484 Comments

Project-Based Learning – Markham

This Project-Based Learning idea is adapted from Geodesic Greenhouses, a PBL by the WV DOE and discovered through the Buck Institute for Education’s Project Search.

Image result for greenhouse jokes

Overview

A local farmer wishes to build a greenhouse on her property to allow for small scale crop production in the winter months, as well as a place to start seedlings early in the spring. Students will meet with the farmer to get a deeper understanding of how greenhouses function, what are some of the important factors to consider, what are some of the key features the farmer wants and needs, and what are her primary concerns, goals, etc. In their collaborative teams, students will brainstorm and design a greenhouse proposal to present to the farmer. This proposal should include possible layouts for plant beds, so the farmer can have figures on the number of beds, growing area, etc. when she makes her final design selection.

Image result for greenhouse jokes

Student Learning Goals

Key Knowledge and Understanding:

  • Apply properties of polygons, conics, solids, etc. to create a functioning greenhouse structure.
  1. CCSS.Math.Content.HSG.GMD.A.3 – Use volume formulas for cylinders, pyramids, cones, and spheres to solve problems.
  2. CCSS.Math.Content.HSG.GMD.B.4 – Identify the shapes of two-dimensional cross-sections of three-dimensional objects, and identify three-dimensional objects generated by rotations of two-dimensional objects
  • Derive and use formulas for area, surface area, and volume to maximize usable growing area while minimizing costs associated with heating/cooling the space, building materials and costs, and working within the confines of the farmer’s available property and functionality requirements.
  1. CCSS.Math.Content.HSG.MG.A.3 – Apply geometric methods to solve design problems (e.g., designing an object or structure to satisfy physical constraints or minimize cost; working with typographic grid systems based on ratios).


Key Success Skills:

  • Work collaboratively, delegating tasks appropriately amongst the team to ensure a successful final project by the deadline
  • Listening to consumer’s (the farmer’s) needs and concerns, following up with appropriate questions
  • Problem solving and reflecting regularly to ensure progress is being made and still on target for acceptable end product
  1. CCSS.Math.Practice.MP1 – Make sense of problems and persevere in solving them.
  2. CCSS.Math.Practice.MP3 Construct viable arguments and critique the reasoning of others.
  • Presentation skills, including design of the presentation and giving said presentation
  1. CCSS.Math.Practice.MP4 Model with mathematics.
  2. CCSS.Math.Practice.MP5 Use appropriate tools strategically


Essential Project Design Elements

Challenging Problem or Question: What is an efficient and effective way for farmers to grow crops and start seedlings when seasonal weather is not conducive to outside cultivation?


Sustained Inquiry: Prior to meeting with the farmer, students will have an opportunity to think about and research surface level answers to the above question. Thus, students will be better prepared to engage with the farmer while they have the initial opportunity. As students begin brainstorming their ideas, additional questions will surface requiring them to return to the research and information-finding stage of the process.


Authenticity: Students will be creating blueprints to present to a real-life farmer for consideration for construction.


Student Voice & Choice: Students will have the choice to design any style/size greenhouse they see fit, taking into consideration the farmer’s requirements and requests. Each team will be able to choose their own method of research, tools for design construction (i.e. GeoGebra, Excel, Google Docs), and form of presentation.


Reflection: Students will have regular check-ins with the teacher to provide progress reports on both the project happenings and their team functionality. Prior to these meetings, they will be asked to self-assess their individual contributions to the project, as well as how the group is functioning as a whole. If issues or concerns are identified, or if the project is not on pace, students will be asked to identify and implement corrective actions.


Critique & Revision: In addition to the regular check-ins with the teacher, each team will have an opportunity to meet with the farmer for a brief update. This will be about halfway through the project timeline. They will present their initial ideas and justifications to the farmer, who will then provide feedback on what she likes of the design thus far and what questions or concerns she has. Students will need to address any questions or concerns in their final presentation.


Public Product: Students will present their final designs to the farmer, who will select the one she most likes to be the base design for her actual greenhouse. The presentation should include some sort of visual display and explanation of the design features. These visual displays will then also be posted at a local hardware and/or farming store for perusal by small farms or individuals for informative purposes or to consider for their own property.


Project Plan

Resources:

  • Challenge question
  • Assorted research resources for students (for example, laptops or tablets with internet access and possibly blueprint design software like AutoCAD; books on greenhouses, plant beds, building construction (and/or access to the school or a public library); access to a local farmer, and possibly other relevant community members (i.e. city or county agriculture official, building permit administrators, local business owners with relevant connections like construction or farm or business suppliers))
  • Lesson plans for associated topics
  • Materials for students to construct final visual presentation

Process:

  • Opening activity –  Begin a class discussion by having students consider, individually or in small groups, questions like the following: Where do fresh fruits and vegetables come from during winter months?  How do communities in extreme climates (like northern Alaska) get fruits and vegetables?  In a competitive field, how can farmers get their products to market before their competitors?  Through the discussion, help steer students toward an understanding of how and why greenhouses are used in the farming community, both for profit and by the casual grower.
  • Give students an overview of the project and its goals.  Let them know this will be an ongoing project over several weeks and will require both in-class and out-of-class time.
  • Place students in their teams and give them an opportunity to research basics of greenhouses.  Allowing students to do some individual research as homework prior to their first team meeting may generate more discussion as students compare and contrast notes.  YouTube has a wealth of videos on the topic of different types of greenhouses, like https://www.youtube.com/watch?v=wPf2b9K9qk0 or https://www.youtube.com/watch?v=FPjko9DDhcU.  (Note: If this will be the first activity students have worked with this team, consider taking the time for team building.)
  • Arrange a meeting with the farmer.  If possible, take students on a field trip to the farm.  Alternatively, have the farmer present to the class, including providing some pictures of the land and the area where the greenhouse will be built.
  • Have teams create a list of project tasks and questions they will need to address.  Students should split the tasks evenly amongst the team and set deadlines for when each needs completed.  Much of the initial work will be done outside class, but the last 10-15 minutes of each class will be set aside for teams to meet and work together.  Additional questions and/or tasks will arise throughout the process; teams should reassess assigned tasks regularly and adjust as needed.
  • Weekly, teacher will arrange meetings for updates with each team during one of the end-of-class 15 minutes.  Additional time can be scheduled with the teacher before or after school if needed. Teacher will facilitate communication between teams and the farmer or additional community members as needed, as well as guide project research if teams are struggling.
  • In the third week, one day will be dedicated fully to team work and mid-project presentations to the farmer.  Each group will have 10 minutes with the farmer (teacher will observe the meeting, as well).  5 minutes will be to share initial ideas, and 5 minutes will be for feedback and questions from the farmer.  While not meeting with the farmer, teams should be working on their own projects.
  • Project should conclude and final presentations be made during week 5 or 6.  Presentations will take two days, and the audience for these presentations will be the farmer, the rest of the class, and any other community members interested in participating.  Each presentation should take approximately 15 minutes and should include an overview of the team’s research and design process, the design itself, a tour of key features of their greenhouse, a summary of the math used in the project, and any other relevant information the team wishes to include.  An additional 5 minutes will be set aside for audience questions (which will be handled, in random turn, by different members of the team).
  • In addition to the presentation, a visual summary should be created.  This will be displayed at a local hardware or farming store.  The visual should include information someone may need if they wished to build this greenhouse (i.e. dimensions, a list of building materials, estimated costs, etc.).  Students may wish to use software like Room Sketcher to aid in their visual design.

Evaluation:

  • Students will have homework, quizzes, and tests on the associated math content (polygons, area, volume, etc.) as would normally be assessed throughout the lessons.
  • Rubrics should be created and used to assess the project at various points.
  1. A rubric for each progress check with the teacher will evaluate how students are functioning as a team, how they addressing issues and conflicts that arise, individual contributions to the project, and whether they are on pace to meet the project deadline.
  2. A rubric for the mid-project meeting with the farmer will assess the depth of research thus far based off the initial ideas presented and the presence and accuracy of the justifications provided.  It will also look for participation by all team members in preparing materials and/or presenting to the farmer.  The farmer will be asked to rate each team on their progress thus far, also, to give each team another perspective on how well their team is functioning.
  3. A rubric for the final project should assess for accuracy of the design, individual team member contributions to overall project, and effectiveness in communicating the final product both in terms of information provided and ability to “market” their idea to the farmer.  Teams should also highlight how they adapted their original design/plan to address questions or concerns raised by the farmer in the mid-project meeting.  Each team member should be able to explain their project details and answer questions related to the math behind the project.  This will be demonstrated through all team members giving a portion of the final presentation and answering questions directed to individual team members in the post-presentation Q&A.

Teacher Notes: Math teachers may wish to collaborate with science or engineering teachers if possible.  Coordinating to include lessons on plant/crop life cycles; the effect of pesticides; solar radiation, convection, and/or conduction; and/or building design and construction could provide excellent opportunities for interdisciplinary work.

Posted in Project-Based Learning | Tagged , , | 713 Comments

Project Based Learning – Prince

https://www.edutopia.org/practice/real-world-problem-solving-project-based-solutions https://www.edutopia.org/project-based-learning-student-motivation

PROJECT
Using a real life question or problem, children design an investigation and representation of their findings to present the audience for which they decide.

MATERIALS NEEDED:
Computers, chart paper, blank books, poster board, trifold presentation boards, books on questions or problems children choose, access to various media (library, online books and information)

STEP ONE: Let children know we are going to be spending some time observing our school and/our community to identify questions and/or problems we notice to try to find the answer to our questions or solutions to our problems.

Ask children if they have any questions or have noticed any problems that need solved. Script what they say on chart paper for all to see.

EXAMPLES MAY BE:

I don’t like the stop light in the cafeteria and I don’t think it works anyways. I would like to find out.

I wonder which month is the most common birthday month for students in our school?

What do teachers have to do to become a teacher?

Why don’t we have more non-fiction books in our classroom library? I would like more nonfiction books.

STEP TWO: For one week leading up to the unit, ask children to be very aware of their school and community and come up with at least three questions they would like to find the answers to or problems they would like to find solutions to. Assign this as homework so parents and families can share in the discussion. Schedule 30 minutes of time per day for the children to simply observe with their clipboards and write down possibilities for topics.

STEP THREE:
Ask children to take what they have come up with and choose three of their ideas and draw a symbol to represent the questions or problem. Then ask them to post these around the room. While 1/2 of the class rotates around the room asking questions about the symbols and the “illustrators” stand at their work and explain the questions or problems they are considering. Then rotate so the other 1/2 of the group can do the same.

ASSESSMENT:
During this time it is very important that the teacher is observing all, both the presenters and observers or children rotating to decide upon groupings. The teacher needs to make sure each group has children who have their ideas developed and others who may not, if there are any in the group who still have very loosely developed questions or problems to solve.

STEP FOUR:
Divide children into groups either by topic if there are common topics or levels of development of ideas. Let them know that each group is going to hear the ideas of all group members and then decide as a group which problem or question they will use. Show children the rubric for the project assessment and also go over the criteria for deciding which questions or problems may lend themselves to a more comprehensive project and presentation.

STEP FIVE:
At least 1.5 to 2 hours per day( can be split up through day) needs to be devoted to project planning and completion. The teacher will facilitate using questioning techniques with each of the groups throughout this time. Asking questions like:
What has your group decided to focus on?
How will you collect facts about this topic?
How will you collect opinions about this topic?
What questions does your group have about this topic?
How will you represent your findings mathematically?

Children will work to answer their questions and/or come up with solutions to the problems they identify. They will decide how to represent their findings through a literature produce, mathematically, scientifically etc.

Children will decide how they will present their findings given a few choices however keeping this open for other possibilities they may explore. Children will present at an evening gathering held with parents, community members and teachers.

Assessment: Observation throughout, group evaluation feedback, products the children create to represent their findings, presentation of the material

https://www.teachingchannel.org/videos/pbl-building-blocks-ntn

Posted in Project-Based Learning | Tagged , , , | 925 Comments

Project Based Learning_Altieri


Project Based Learning Lesson

Content:  Geometry (could be a cross-curricular lesson with collaboration from visual arts, technology, and language arts courses)

Introduction: Students are always asking where they will see mathematics in the real world.  One huge example is within the visual arts.  There are many artists and mathematicians whose works flow into each other’s fields of study (examples include M.C. Escher, Leonardo da Vinci, and George Hart).  This project allows students to think critically about the connections between visual arts and geometry and share out their knowledge and understanding with community members.  For this project students will work in mid-sized teams of about 4 students.  


This Pinterest link has some of M.C. Escher’s artwork which showcases connections between arts and mathematics.


  • Student Learning Goals


      • Key Knowledge & Understanding:  Students will be able to make connections between geometry concepts and visual arts.  Through the process they will also learn and build on their knowledge of geometry concepts and their ability to critically analyze artwork.


  • Key Success Skills: Students will learn to analyze and interpret artwork form the lense of geometry understanding.  They will communicate their understanding with their peers through collaboration and self-management, and they will create a public product to share their knowledge.  
  • Essential Project Design Elements
  • Challenge Problem or Question:


How can we analyze artwork through the lense of geometry?


  • Sustained Inquiry: Throughout the year students will have time to connect their learning in Geometry to visual arts.  Their first task will be to take each unit of Geometry study and apply it to visual arts.  They can explore various art forms (conceptual arts, optical illusions, tessellations, perspective drawings, geometric abstraction, urban art, etc.), they can delve into artists whose work reflects geometrical knowledge, and they can learn from community members who interact with both art and mathematics (mathematics professors at local colleges, museum directors at the various city art museums, artists within the city, and Jackson School for the Arts directors and professors).  For each unit of study in Geometry, students will have time to explore these connections, take notes, collaborate, check in with the instructor, and begin to formulate ideas to answer their challenge question and begin designing their final product.
  • Authenticity: Revitalizing the city of Canton (where I teach) has been a goal of the city for the past few years.  One of the ways they are doing so is to put an emphasis on the arts.  New galleries have opened, the art museum has been expanded, urban murals have been commissioned, and arts in the city have been incorporated into nightlife events downtown.  It is important for students to understand the connections between mathematics and the real-world; and this assignment, to connect geometry with the arts, is authentic because students will be engaging in, and learning about, how visual art impacts the growth of their city.   
  • Student Voice & Choice:  Students have the autonomy to explore the connections between geometry and art, reach out to local experts,  and design their final public product.  Students will work collaboratively, but will each be personally responsible for their work on the project.
  • Reflection:  Throughout the lesson students will have the opportunity to reflect on their work (this may be in the form of written reflections, journal prompts, or responding to teacher prompting).  Students will use these reflections to edit and revise their work and continue to build their understanding.
  • Critique & Revision: Once per 9-week period, students will create a post-it poster with their ideas, processes, and goals for their project.  They will do this during class time.  They will then hang their team’s work around the room and participate in a critique process called a gallery walk.  During the gallery walk all students will explore the ideas of other teams.  Each student will have a set of sticky notes to write down “cool” and “warm” feedback for other teams.  They will post these sticky notes to other posters.  Then each team can look at the feedback from their peers to make revisions.  The gallery walk is silent and allows students to reflect, learn from, and provide feedback to their peers.
  • Public Product:  Students have a choice in their public product.  Their goal is to create a product that will raise awareness of the connections between geometry and visual arts, while also showcasing the content and connections that they explored and learned.  Some students may elect to create pamphlets for the local art museum to give to customers on First Friday (an event downtown), other students may choose to create an online art gallery of their own to be shared with members of the community, and some students may want to create their own google map walking tour or podcast of the city and the geometric art connections that can be made throughout Canton.  The choice is up to the student teams and the teacher can help to facilitate and assist in finding resources for student use.


The connections between arts and mathematics are important.  The following tweet from Edutopia illustrates the importance of embedding Arts into STEM to become STEAM.

Edutopia on twitter also has other great ideas for incorporating PBL lessons into classrooms of all content areas.


Some Resources for students:

Canton Arts District

Artists who use Geometry

Famous Geometric Abstract Artists

Artworks that use Shape

Posted in Project-Based Learning | Tagged , , , | 24 Comments

Knurek – PBL

PBL Lesson: “Height vs. Shoe Size”

Standards:

8.SP.1: Construct and interpret scatter plots for bivariate measurement data to investigate patterns of association between two quantities. Describe patterns such as clustering, outliers, positive or negative association, linear association, and nonlinear association.

8.SP.2: Know that straight lines are widely used to model relationships between two quantitative variables. For scatter plots that suggest a linear association, informally fit a straight line, and informally assess the model fit by judging the closeness of the data points to the line.

8.SP.3: Use the equation of a linear model to solve problems in the context of bivariate measurement data, interpreting the slope and intercept. For example, in a linear model for a biology experiment, interpret a slope of 1.5 cm/hr as meaning that an additional hour of sunlight each day is associated with an additional 1.5 cm in mature plant height.

Objectives:

  • Students will be able to construct a scatter plot.
  • Students will be able to identify outliers in data.
  • Students will be able to draw a line of best fit.
  • Students will be able to come up with the equation for the line of best fit.
  • Students will be able to use linear regression.

Student Learning Goals:

This project requires students to collect and analyze data to see if there is a strong relationship between a person’s height and their shoe size. Students are challenged with a task as a lawyer for a person being charged with a crime. They are required to use statistical reasoning to justify whether or not the person is innocent.

This lesson requires students to perform the following:

  • Collect meaningful data
  • Create a scatter plot of data
  • Identify outliers in a set of data
  • Come up with an equation to represent the line of best fit for a set of data
  • Come up with and analyze linear regression

Challenging Problem:

You are a lawyer hired by a man being charged with robbery. The man who hired you was one of several men spotted near a bank right after it had been broken into. The man swears that he did not rob the bank, saying that he was just in the wrong place at the wrong time. The man was arrested after the one sole witness identified him as the robber. However, her statement about the man’s height and shoe size doesn’t seem to be accurate:

“The man was over 6-feet tall! However, he seemed to have very small feet. I would have to say he probably wears a size 8, maybe size 7”

Project Outline:

If you can prove that the sole witness’s statement is invalid, the man will be set free (proven innocent). Your goal is to prove that this man is innocent by falsifying the witness’s statement using statistical reasoning. You must collect and analyze data on people’s heights and shoe sizes. You can collect the data however you’d like, but you must be able to justify your final sample size.

(Students will have time in class to work on this project, but are encouraged to collect data outside of the classroom. The goal is to have the students collect data from people of all heights and sizes. If they only collect data in their class, the sample will be restricted to 8th grade students.)

Assessment:

Upon completion of the data collection process, put together a presentation of the data to justify to your classmates that the witness’s statement is false. Your presentation should include a scatterplot of the data you collected, along with the line of best fit and linear regression.

Authenticity:

This is the part that I’m struggling with. I think that this lesson is in part ‘real-world’, however the statement that the witness gave would never be enough to put a suspect in jail. However, I do think the process of using data to justify a decision is very ‘real-world’. This lesson could shed light on how statistics can be used to not only justify your own decisions, but also to persuade the decisions of others.

Reflection:

The reflection process of this project will take two different forms:

  1. Class Discussion: After all of the students have presented, the teacher will lead a class discussion on the similarities and differences between the data presentations. Were some people more thorough than others? How can we determine if a sample size accurately represents a population? There are a lot of statistical connections that can be made during this discussion.
  2. Personal Reflection: The teacher will fill out a rubric with feedback for the students. The feedback will provide the students with strengths and weaknesses for their statistical argument. The student will reflect on their presentation and data collection process using this feedback.

Media:

Posted in Misc, Project-Based Learning | Tagged , , , , | 722 Comments