Cooperative Learning Lessons
Kristina Hamester
Idea #1: Cooperative Learning “Signs All Around Us” 
Based on Co-op Co-op, by Spencer Kagan
A class of Second Grade ESL students learn about safety signs in a community and work together to form an imaginative community.
Materials:
- Assortment of signs with definitions – 9 or more different signs
- Graphic Organizer http://ilove1stgrade.blogspot.com/2011/01/non-fiction-writing.html
- Butcher Paper
- Crayons/Pencils/Erasers/Markers
- Book About Signs – for Read Aloud
- Chromebooks – for research
- * Optional – Sign Bingo
Lesson Delivery
- Ask Students, “What is a community?” A community is a group of people living in the same place or having a particular characteristic in common. We are learning in a school community.
- A community can be bigger than a school and include a neighborhood and the shops around it too. Show students a picture of a community map like the one shown here from National Geographic: https://www.nationalgeographic.org/maps/community-map/

Ask students to tell elements of this community and their symbols. These include houses, roads, a school, businesses, restaurants, a park, a farm and a bank.
2.) Show students 3 community signs (including road signs, school related signs, and signs for places of business) and ask how incorporating signs can help people get to places they need and keep the community safe. Here is a link to printable community signs: https://www.teacherspayteachers.com/Product/Community-Signs-Flashcards-with-Words-1141412


3.) As a whole group, the teacher asks students what are other kinds of signs you have seen? Each student writes ideas on the the board as a chalk talk activity called, “Types of Signs”. Students each have their own colored marker that distinguishes their contributions so the teacher is able to see who is engaged in the activity and who may be struggling. The teacher challenges students to think about whether these signs are road signs, school related signs, business related signs or other.
4.) Students form teams of 3 on their own with each student being responsible for a type of community sign (road, school, or business related.) If teachers need to rearrange groups, they can do so.
4.) Individually, students will learn about the kind of sign they represent. This can be done with printable articles or notes about different signs, books about signs or students may be allowed to research their kinds of signs on the internet. Students need to find three signs that fit in their category, they need to know what the sign is called and why this sign is useful to people. The teacher may give students a graphic organizers like this one to help them sort their ideas (through drawing and writing) out on paper.
5.) Once their research is complete, students rejoin their teams to combine all 9 signs in a made up community which they will draw on butcher paper. Each student will use a separate color to draw their part of the map and their signs. Each will be responsible in explaining how their signs contribute to a safe community.
6.) Students will evaluate their own presentations through a few questions such as, “Which parts of your presentation were strongest? Which parts of the presentation could use more detail?” The teacher can give feedback to each team based on these questions as well and recommendations for future presentations. Beyond this, no formal evaluation is needed as learning can be the reward.
7.) For extra fun as whole group if time allows, play Bingo – with Signs https://www.teacherspayteachers.com/Product/Community-Signs-BINGO-1235576
Idea #2: Team Building “Let’s Bake a Cake!” 
Based on Team Investigation, by Shlomo Sharan
A class of First Grade ESL students will explain how to make a dessert of their choice.
Materials
- Picture Cards and matching Word Cards (for 5-6 different desserts) with velcro attached
- Felt board to display the order of baking.
- Books about baking for supplemental material, including “Let’s Bake a Cake”
- Sweet Treat as prizes – cupcakes, candy, brownies
- Extras: Fun printables of baking vocabulary http://www.miniaturemasterminds.com/2015/03/18/lets-bake-a-cake-measuring-and-recipe-reading-pack-includes-early-reader-book-i-am-baking-a-cake/
- The teacher says that today we will be baking! Students will place themselves in teams of 3. Each team should choose a colored chef hat to represent them (Team Red, Blue, Yellow, Green, Purple). Teams will be asked to decide an item they want to “bake”. These could include a cake, brownies, cookies, a pie, a cobbler, or cupcakes.
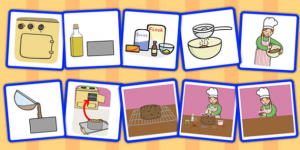
 2. Given a set of 12 cards– including various baking utensil picture cards and some word cards, such as “mix the batter”. Students must work together to match the word cards with the picture cards first.
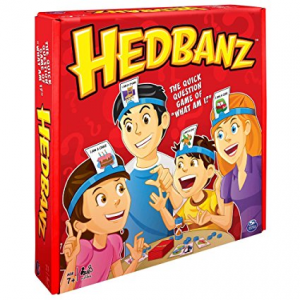
The trick is each student can only  pick up one picture card at a time but can not look at the card until their teammates have described it to first to them and they have guessed what it is. In a sort of “Hedbanz” party game fashion, students hold a picture card on their forehead and while other students on their team describe what they see. The student guessing reads the 6 word cards to figure out what it is they have on their heads. Once all students have had 2 turns to guess the cards, the cards will all be matched. This game ensures that students are all participating in the game, and rely on each other to help their team move forward.
For reference of Headbands Party Game see: http://howdoyouplayit.com/headbanz-rules/
3. After word and picture cards are matched, students must work together put the cards in sequence order of first to last step in how to bake an item. Example: Match the “mix the batter” card to a picture of a bowl of batter and a spoon.
4. Students will arrange their steps on a felt chart and practice presenting 2 of the 6 steps for a whole class presentation. Hearing for each student about only 2 of the steps in “baking their dessert” will stress interdependence within the group.
5. As a team, students will present their cards by each explaining two of the steps, with a total of 6 steps. Here, teachers will check student participation through watching the team present equal parts of the process.
6. Teams that successfully “bake their cakes” within the suggested amount of time win a special sweet treat.
