When you record a Webex Meeting or Training, the recording is saved to a Webex server (but PC users should read the note below), and it’ll appear within your miamioh.webex.com account when it’s done processing, which typically takes about twice as much time as your video’s length. When your video is ready, you can either download its file or share it via email or a link.
Note regarding recorded Webex Trainings: All recorded Webex Trainings are produced in .arf format, which is not viewable outside of Webex. You can still share your recording via link or email (it will play in a browser window), or if you’re a PC user, you can convert it to a .wmv file using Webex’s Network Recording Player. (Currently, Webex does not have a converter for Mac users.)
Note for PC users: If you’re on a PC, Webex will prompt you to choose whether to save your recording to your computer or to the cloud. We highly recommend that you save your meeting to the cloud; otherwise, it’ll be produced in a format (.wrf) that has to be converted before it can be played.
Download the Recorded Meeting’s File
- Log in to your account on the Webex website. A list of your Webex meetings will be displayed.
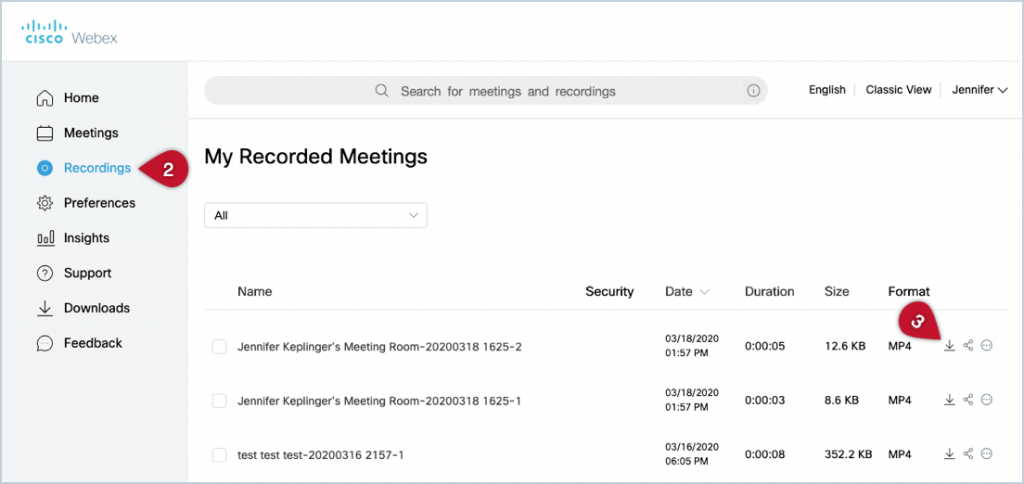
- Click Recordings on the menu on the left side of the page. A list of all of your recorded Webex meetings will be displayed.
- Click the download icon to the right of your meeting’s name; it looks like a downward-pointing arrow. Your meeting recording will download as a .mp4 file.
You can now upload the video file to your Canvas course. Be sure to upload it through the My Media link rather than in the Files area or directly to a module.
Share your Recorded Meeting via Email or a Link
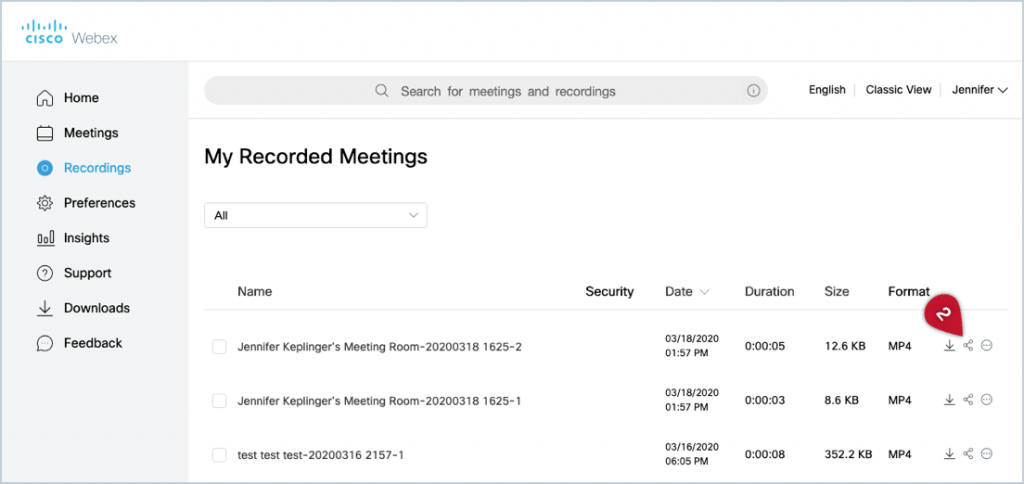
- Follow steps 1 and 2 above to access your recorded Webex meetings.
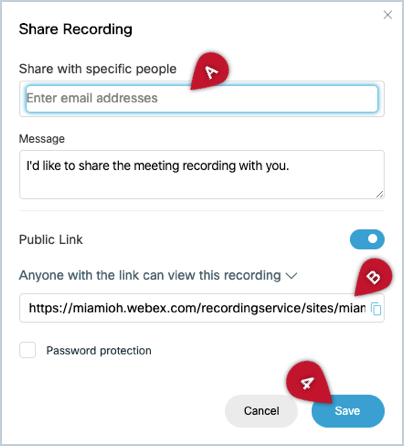
- Click the share icon to the right of your meeting’s name. A pop-up window will open that displays different sharing options for your recorded meeting.
- Select an option for sharing your recording:
A. To send an email with a link to your recording, enter email addresses in the “Share with specific people” textbox.
B. To copy a link to your recording, copy the text under the “Public Link” heading.
- Click the Save button. A confirmation that your recording has been shared will be displayed, then the pop-up window will close.