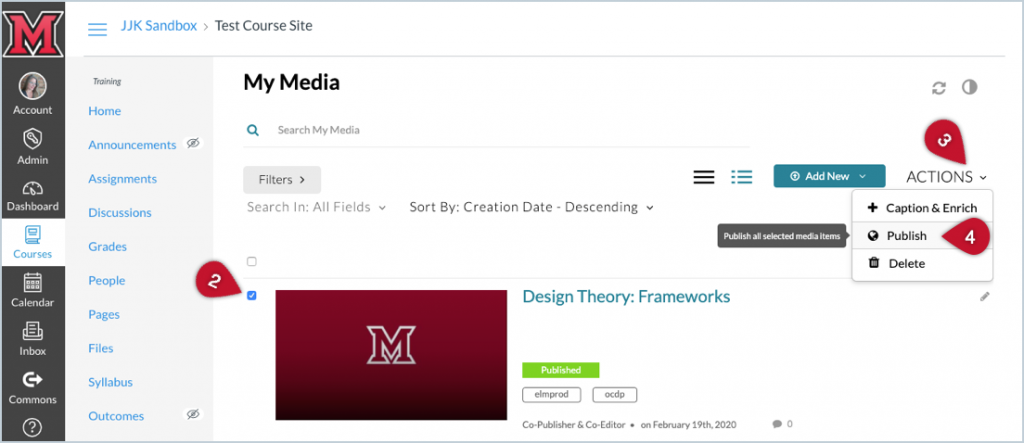
By default, a video’s status is set to “private” when you add it to Kaltura. If you want to change it to “published” so you can share it with students, follow this quick method (which will also allow you to publish multiple videos at once):
- Click My Media in your course navigation menu. A gallery of your Kaltura videos will be displayed.
- Select the very tiny checkbox to the left of the video’s name. You can select multiple videos if you need to publish more than one.
- Click the Actions dropdown menu at the top-right side of the page. A list of settings options will be displayed.
- Click Publish. A list of publication options will be displayed.

- Select the Published option. More options will be displayed, but you’ll want to skip them unless you’ve already set up a Media Gallery for your course (see the note below).
- Click the Save button at the bottom of the page.
Note: Once you’ve changed a video’s status to “Published,” a list of your courses will be displayed. This new list allows you to add a video to the course’s Media Gallery, which is separate from My Media. Therefore, selecting a course from this list will not make the video visible to students unless you’ve already set up its Media Gallery, which simply displays a gallery of all videos in your course without any contextualization.